Магазинам

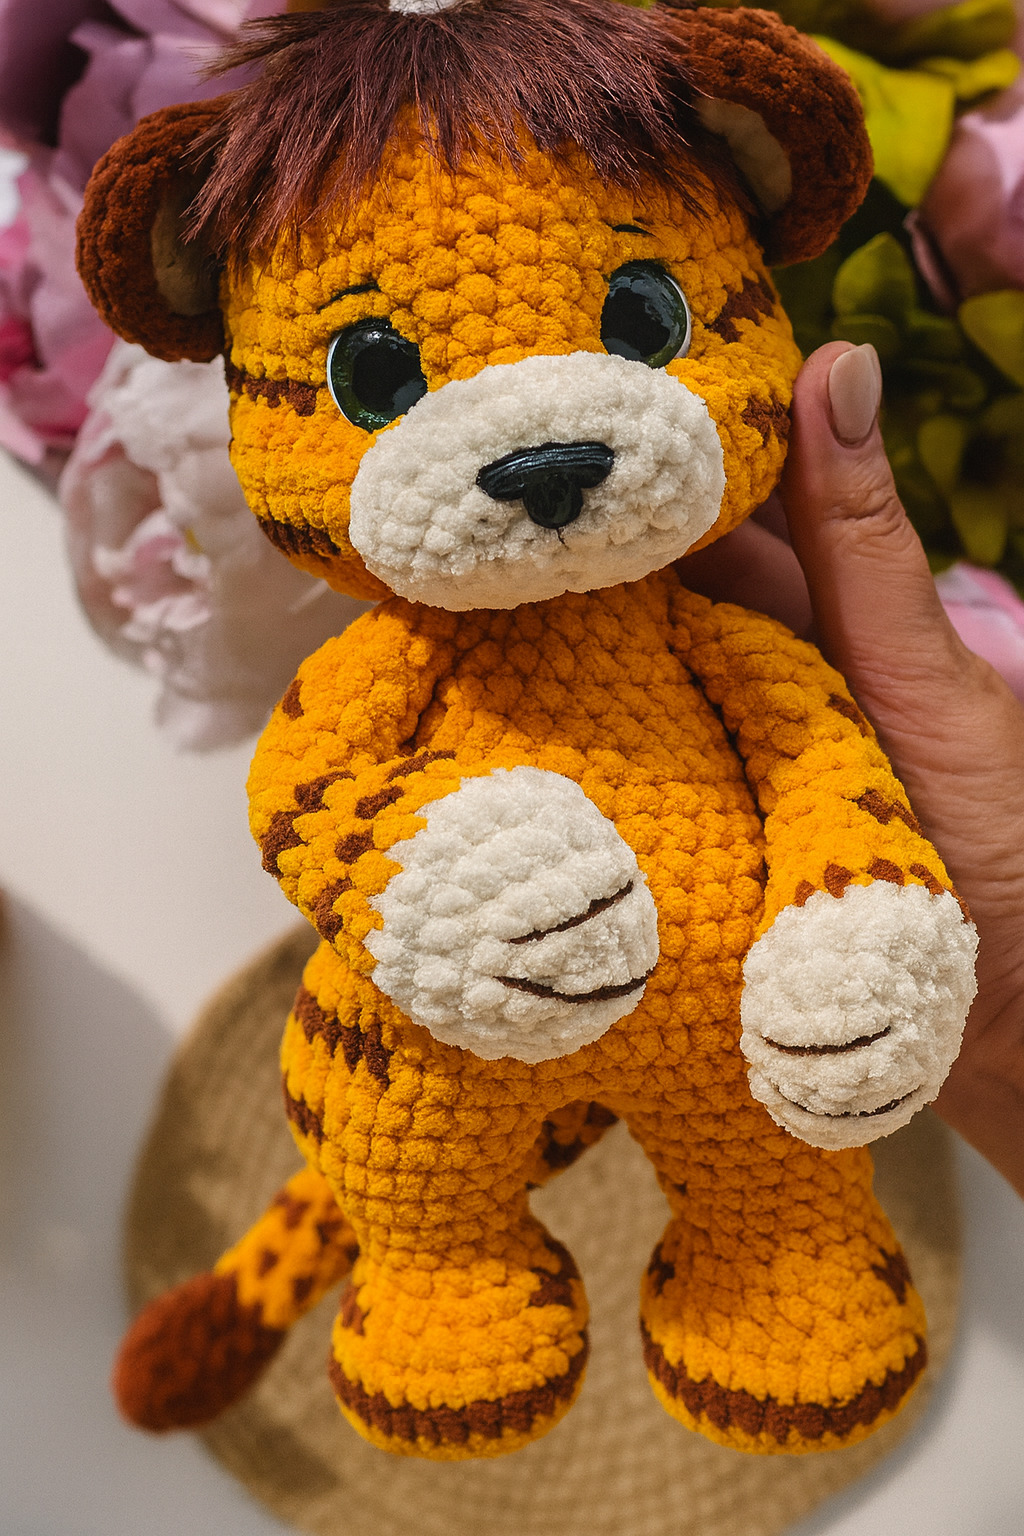
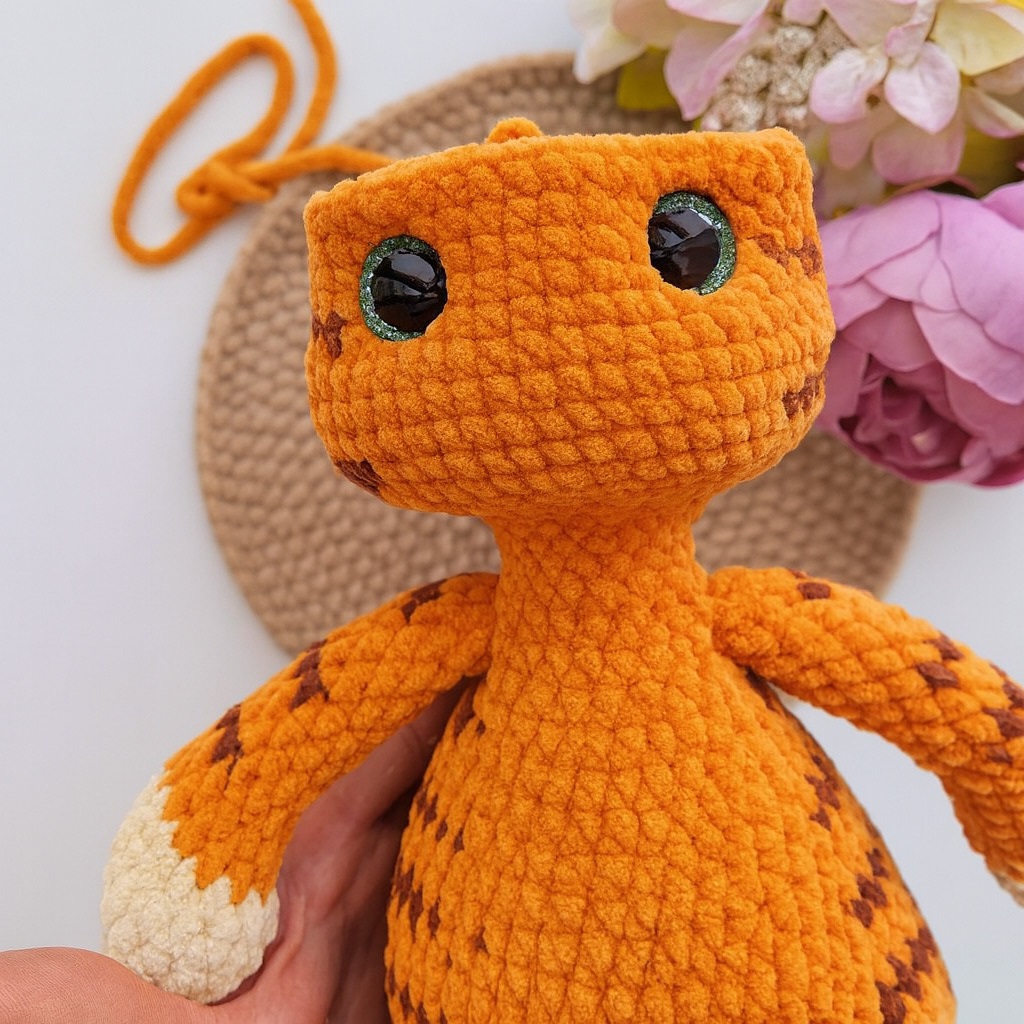
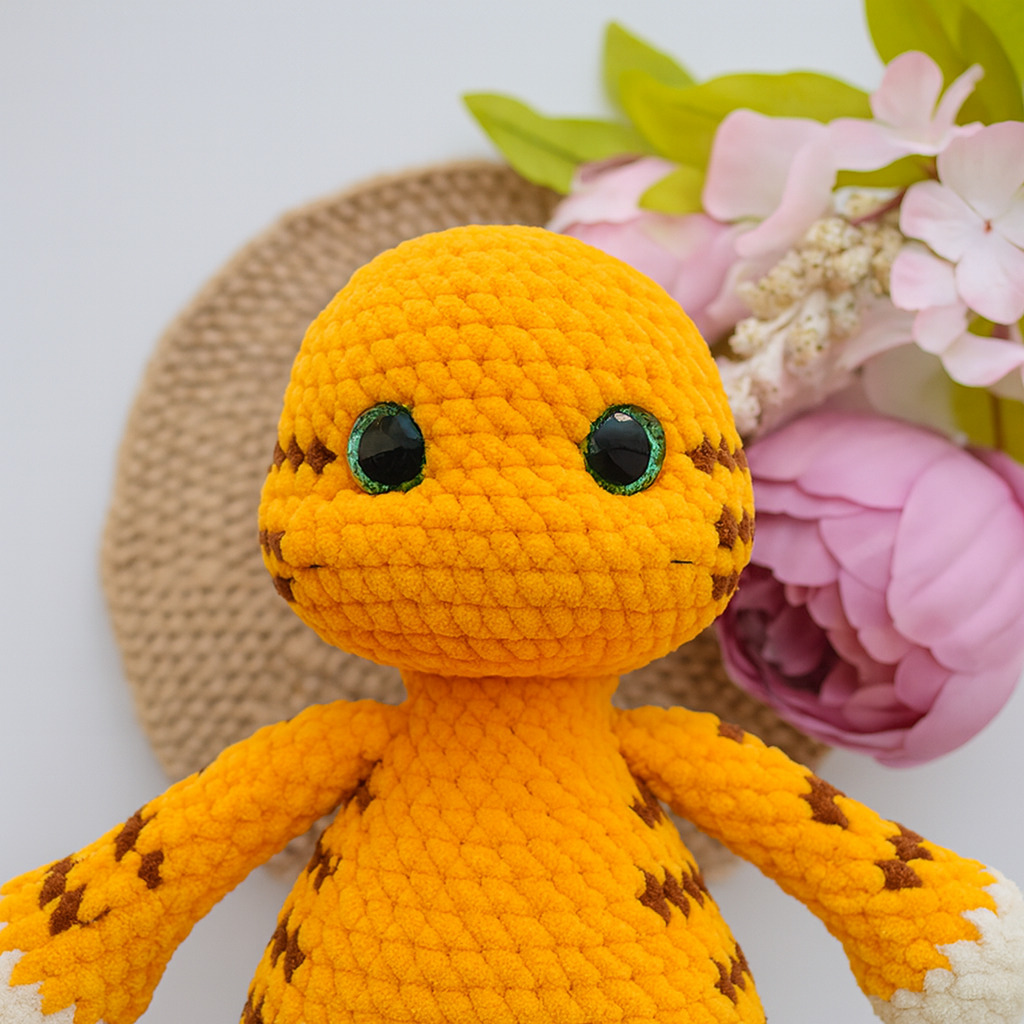
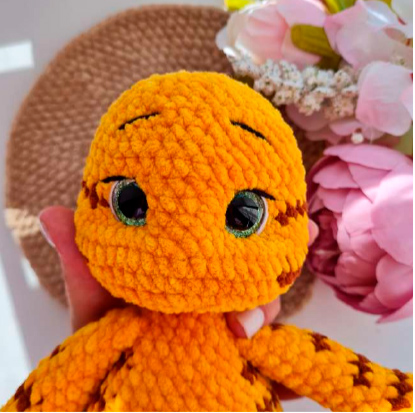
Мастер-класс игрушки из плюшевой пряжи - Тигренок
- В зависимости от марки пряжи, размера крючка, плотности и стиля вашего вязания размер игрушки и расход пряжи может измениться
- Рекомендую вязать все детали по порядку, представленному в мастер-классе.
- Вяжите плотно, чтобы наполнитель непроглядывал через полотно вязания.
- Уровень сложности: средний.
- Советую парные детали вязать одновременно!
- Вяжите сначала первую деталь, а затем сразу вторую.
- Не оставляйте вязание “на потом”, иначе детали могут получиться не одинаково.
КА - кольцо амигуруми;
Сбн. - столбик без накида;
Пр. - прибавка(провязываем два столбика в одну петлю);
Уб. - убавка (провязываем два столбика вместе);
ПССН - полустолбик с накидом;
В.п - воздушная петля;
С.с - соединительный столбик;
(...)*N - повторить действие несколько раз подряд;
МЦ - меняем цвет.
При вязании игрушки из указанных материалов размер игрушки составит 25см.
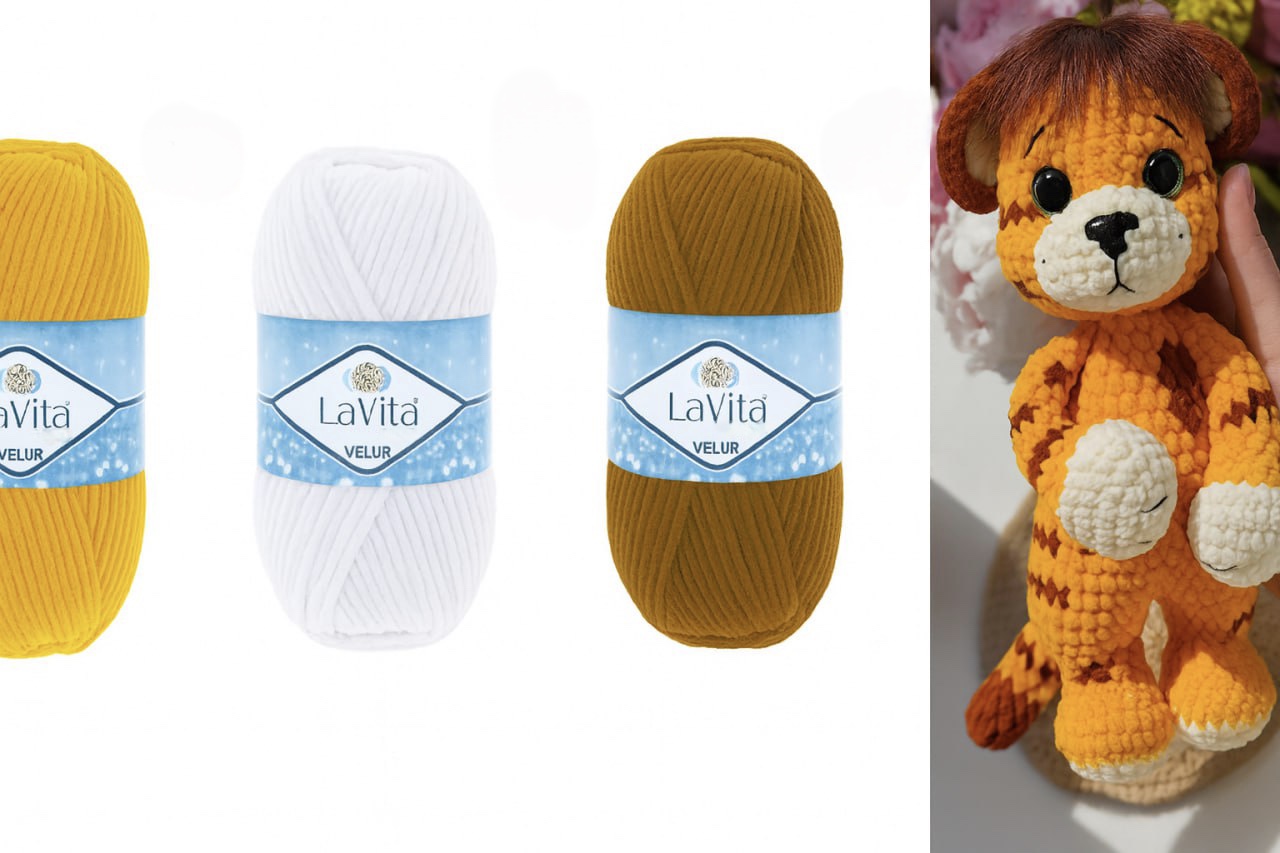
- Плюшевая пряжа 120м/100г (Lavitayarn, HimalayaDolphin Baby или ее аналог)
- Основной цвет 100г
- Дополнительный цвет 20г
- Пряжа Yarnart jeans для оформления белая01 и черная 28
- Крючок номер 3 или 3.5
- Глаза на безопасном креплении 16 мм
- Нос 16 мм
- Игла большая
- Маркер
- Ножницы
- Наполнитель
- Булавки портновские
- Клей
Вязание начинаем белым цветом.
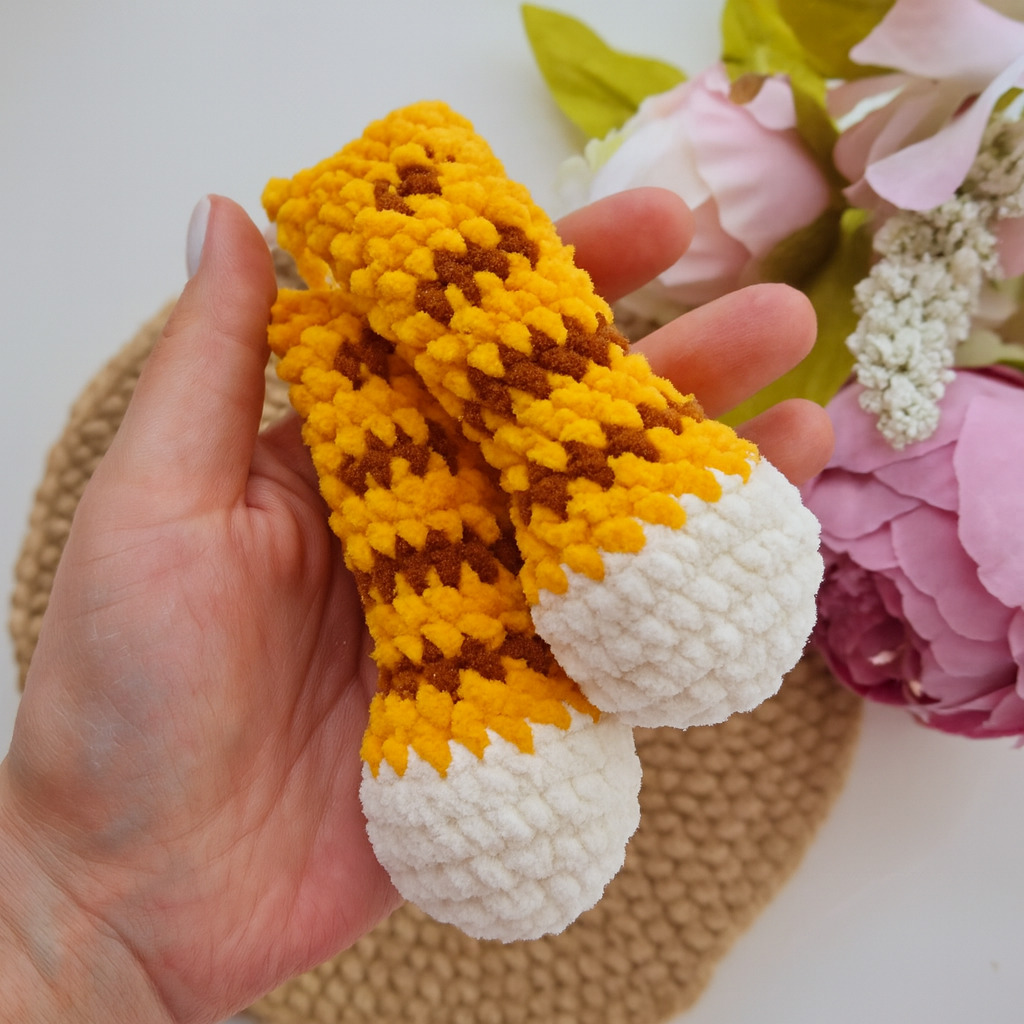
Правая и левая ручки вяжутся одинаково.
Маркер должен идти посередине снизуручки.
| Ряд | Цвет ряда | Вязать | Кол-во петель в ряд |
|---|---|---|---|
| 1 | 6 сбн. в КА | 6 | |
| 2 | 6 пр. | 12 | |
| 3 | (1 сбн.,пр.) * 6 | 18 | |
| 4 | 5 сбн. (1 сбн.,пр.) * 4, 5 сбн. | 22 | |
| 5-6 | 22 сбн. (2 ряда) | 22 |
| 7 | 5 сбн. (1 сбн.,уб.) * 4, 5 сбн. | 18 | |
| 8 | (1 сбн., уб.) * 6 | 12 |
| 9 | 3 сбн. [ 6 сбн.] 3 сбн. | 12 | |
| 10-11 | 12 сбн. (2 ряда) | 12 | |
| 12 | 3 сбн. [ 6 сбн.] 3 сбн. | 12 | |
| 13-14 | 12 сбн. (2 ряда) | 12 | |
| 15 | 4 сбн. [ 4 сбн.] 4 сбн. | 12 | |
| 16-17 | 12 сбн. (2 ряда) | 12 | |
| 18 | 5 сбн. [ 2 сбн.] 5 сбн. | 12 | |
| 19 | 12 сбн. | 12 |
Провязываем пару сбн. для того, чтобывыровнятьмаркер, и он оказался сбоку ручки.
Складываем деталь пополам и провязываем 6 сбн.
| Ряд | Цвет ряда | Вязать | Кол-во петель в ряд |
|---|---|---|---|
| 1 | 8 сбн в КА. | 8 | |
| 2-5 | 8 сбн. (4 ряда) | 8 |
| 6-7 | 8 сбн. (2 ряда) | 8 |
| 8 | 1 сбн. [ 6 сбн.] 1 сбн. | 8 | |
| 9-10 | 8 сбн. (2 ряда) | 8 | |
| 11 | 1 сбн. [ 6 сбн.] 1 сбн. | 8 | |
| 12-13 | 8 сбн. (2 ряда) | 8 | |
| 14 | 1 сбн. [ 6 сбн.] 1 сбн. | 8 | |
| 15-16 | 8 сбн. (2 ряда) | 8 | |
| 17 | 1 сбн. [ 6 сбн.] 1 сбн. | 8 | |
| 18-19 | 8 сбн. (2 ряда) | 8 | |
| 20 | 1 сбн. [ 6 сбн.] 1 сбн. | 8 | |
| 21-22 | 8 сбн. (2 ряда) | 8 | |
| 23 | 1 сбн. [ 6 сбн.] 1 сбн. | 8 | |
| 24 | 8 сбн. | 8 |
Хвостик не набиваем.
Провязываем 1 сбн. и останавливаем вязание сбоку хвоста, складываем деталь пополам и провязываем 4 сбн.
Вязание начинаем белым цветом.
Следите чтобы маркер шел ровно посередине сзади ноги, при необходимости делайте петлисмещения.
| Ряд | Цвет ряда | Вязать | Кол-во петель в ряд |
|---|---|---|---|
| 1 | 8 сбн. в КА | 8 | |
| 2 | 8 пр. | 16 | |
| 3 | 5 сбн., 6 пр., 5 сбн. | 22 |
| 4 | 7 сбн., (1 сбн., пр.) * 4, 7 сбн. | 26 |
| 5 | 3 сбн., [ 7сбн.], 6сбн., [ 7сбн.], 3сбн. | 26 | |
| 6 | 26 сбн. | 26 | |
| 7 | 7 сбн. (уб., 1 сбн.) * 4, 7 сбн. | 22 | |
| 8 | 3 сбн., [ 6 сбн.], 4 сбн., [ 6 сбн.], 3 сбн. | 22 | |
| 9 | 5 сбн., (1 сбн., уб.) * 4, 5 сбн. | 18 | |
| 10 | (1 сбн., уб.) * 6 | 12 | |
| 11 | 12 сбн. | 26 | |
| 12 | (1 сбн., пр.) * 6 | 18 | |
| 13 | 3 сбн., [ 4 сбн.], 4 сбн., [ 4 сбн.], 3 сбн. | 18 | |
| 14 | 6 пр., 12 сбн. | 24 | |
| 15 | 24 сбн. | 24 |
По ходу вязания плотно набиваемножку, формируя стопу.
В следующую петлю делаемсоединительный столбик и обрезаемнить.
Вяжем точно так же как и левую, заисключением 14 ряда.
| 14 | 12 сбн., 6 пр. | 24 | |
| 15 | 24 сбн. | 24 |
Нить не обрезаем!
Провязываем еще 6 сбн. И останавливаем вязание сбоку ножки с внутренней стороны.
Вязание продолжаем оранжевым цветом. Держим ножки лицом от себя.
| Ряд | Цвет ряда | Вязать | Кол-во петель в ряд |
|---|---|---|---|
| 1 | На ножке с необрезанной нитью (правая), провязываем вперед еще 6 сбн., останавливаем вязание посередине ножки сбоку и набираем 2в.п. ставим маркер. Это будет центр нашего тела. Набираем еще 1 в.п. Теперь на левой ножке отступаем 6 сбн. назад от окончания вязания и в этот сбн. присоединяем цепочку из воздушных петель. И вяжем по левой ножке 24 сбн., 3 сбн по цепочке из в.п., 24сбн. по правой ножке и 2 сбн. Обратной стороне цепочки из в.п. | 54 |
Со 2 ряда начинаем вывязывать полоски.
[...] - в квадратных скобках отмечено количество сбн., которые будем провязывать коричневым цветом и образовывать полоски тела.
Следите, чтобы маркер шел ровно по центру тела, при необходимости делайте петлисмещения.
| 2 | 8 сбн. [ 12 сбн. ], 14 сбн., [ 12 сбн.], 8сбн. | 54 | |
| 3 | 11 сбн., (1 сбн., уб.) * 3, 15 сбн., (уб., 1сбн.)*3,10 сбн. | 48 |
В 4 и 5 ряду ввязываем хвост, прикладывая его полосками вверх.
| 4 | 46 сбн., 2 сбн. с хвостом | 48 | |
| 5 | 2 сбн. с хвостом, 7 сбн., [ 8 сбн. ], 15сбн., [ 8сбн.],8 сбн. | 48 | |
| 6 | (6 сбн., уб.) * 6 | 42 | |
| 7 | 42 сбн. | 42 | |
| 8 | 8 сбн. [ 7 сбн. ], 12 сбн., [ 7 сбн.], 8 сбн. | 42 | |
| 9 | (5 сбн., уб.) * 6 | 36 | |
| 10 | 36 сбн. | 36 | |
| 11 | 7 сбн. [ 6 сбн. ], 11 сбн., [ 6 сбн.], 6сбн. | 36 | |
| 12 | (4 сбн., уб.) * 6 | 30 | |
| 13 | 30 сбн. | 30 |
По ходу вязания плотно набиваем тело наполнителем, уделяя особое внимание животику.
| 14 | 6 сбн. [ 5 сбн. ], 9 сбн., [ 5 сбн.], 5 сбн. | 30 | |
| 15 | (3 сбн., уб.) * 6 | 24 | |
| 16 | 24 сбн. | 24 |
В 17 ряду ввязываем ручки.
| 17 | 3 сбн., 6 сбн.с рукой, 6 сбн., 6 сбн. с рукой, 3сбн. | 24 | |
| 18 | (2 сбн., уб.) * 6 | 18 | |
| 19 | 18 сбн. | 18 |
Нить не обрезаем. Далее будем вязать голову.
Следим, чтобы маркер шел ровно по центру сзади головы. При необходимости делайте петли смещения.
| Ряд | Цвет ряда | Вязать | Кол-во петель в ряд |
|---|---|---|---|
| 1 | 18 сбн. | 18 | |
| 2 | (2 сбн., пр.) * 6 | 24 | |
| 3 | (3 сбн., пр.) * 6 | 30 | |
| 4 | (4 сбн., пр.) * 6 | 36 | |
| 5 | (5 сбн., пр.) * 6 | 42 | |
| 6 | (6 сбн., пр.) * 6 | 48 | |
| 7 | 12 сбн., (1 сбн., пр.) * 3, 12 сбн., (пр., 1сбн.) * 3, 12 сбн | 54 |
| 8 | 7 сбн., [12 сбн.], 16 сбн., [12 сбн.], 7сбн. | 54 | |
| 9-10 | 54 сбн. (2 ряда) | 54 | |
| 11 | 15 сбн., 4 уб., 8 сбн., 4 уб., 15 сбн. | 46 | |
| 12 | 8 сбн., [8 сбн.], 13 сбн., [8 сбн.], 9сбн. | 46 | |
| 13 | 3 сбн., уб., 11 сбн., уб., 10 сбн., уб., 11 сбн., уб., 3 сбн. | 42 | |
| 14-16 | 42 сбн. (3 ряда) | 42 | |
| 17 | (5 сбн., уб.) * 6 | 36 |
| 18 | 36 сбн. | 36 | |
| 19 | (4 сбн., уб.) * 6 | 30 | |
| 20 | (3 сбн., уб.) * 6 | 24 | |
| 21 | (2 сбн., уб.) * 6 | 18 | |
| 22 | (1 сбн., уб.) * 6 | 12 | |
| 23 | 6 уб. | 6 |
В следующий сбн. делаем с.с., обрезаем и закрепляем нить.
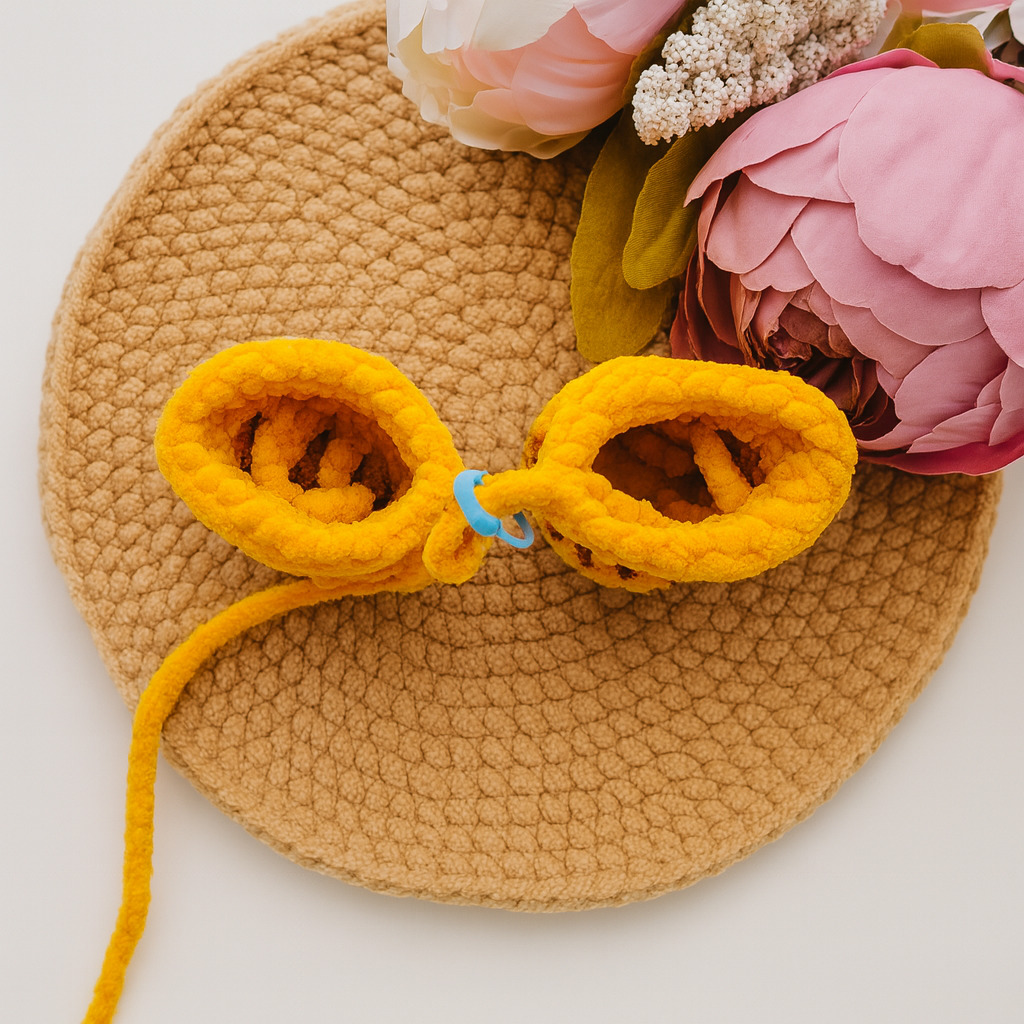
Необходимо связать 4 детали: 2 детали дополнительного (белого) и 2 детали основного (оранжевого) цветов. Все 4 детали вяжем по одной и той же схеме.
| Ряд | Цвет ряда | Вязать | Кол-во петель в ряд |
|---|---|---|---|
| 1 | 6 сбн. В КА | 6 | |
| 2 | 6 пр. | 12 | |
| 3 | (1 сбн., пр.) * 6 | 18 |
Теперь берем одну деталь дополнительного цвета и одну основного и складываем их изнанкой друг к другу. Держим их так, чтобы деталь основного цвета смотрела на вас. Берем нить дополнительного (коричневого) цвета и обвязываем по кругу две детали обычными сбн. Вяжем за 2 полотна 18 сбн. Далее вяжем еще один ряд 18 сбн., но вяжем его за задние стенки. Нити закрепляем, отрезаем и прячем внутрь.

Вяжем деталь белой пряжей.
| Ряд | Цвет ряда | Вязать | Кол-во петель в ряд |
|---|---|---|---|
| 1 | Набираем 9 в. п. и со 2 петли от крючка 7сбн., 3сбн. в крайнюю петлю, 6 сбн., пр. | 18 | |
| 2 | (2 сбн., пр.) * 6 | 24 | |
| 3-4 | 24 сбн. (2 ряда) | 24 |
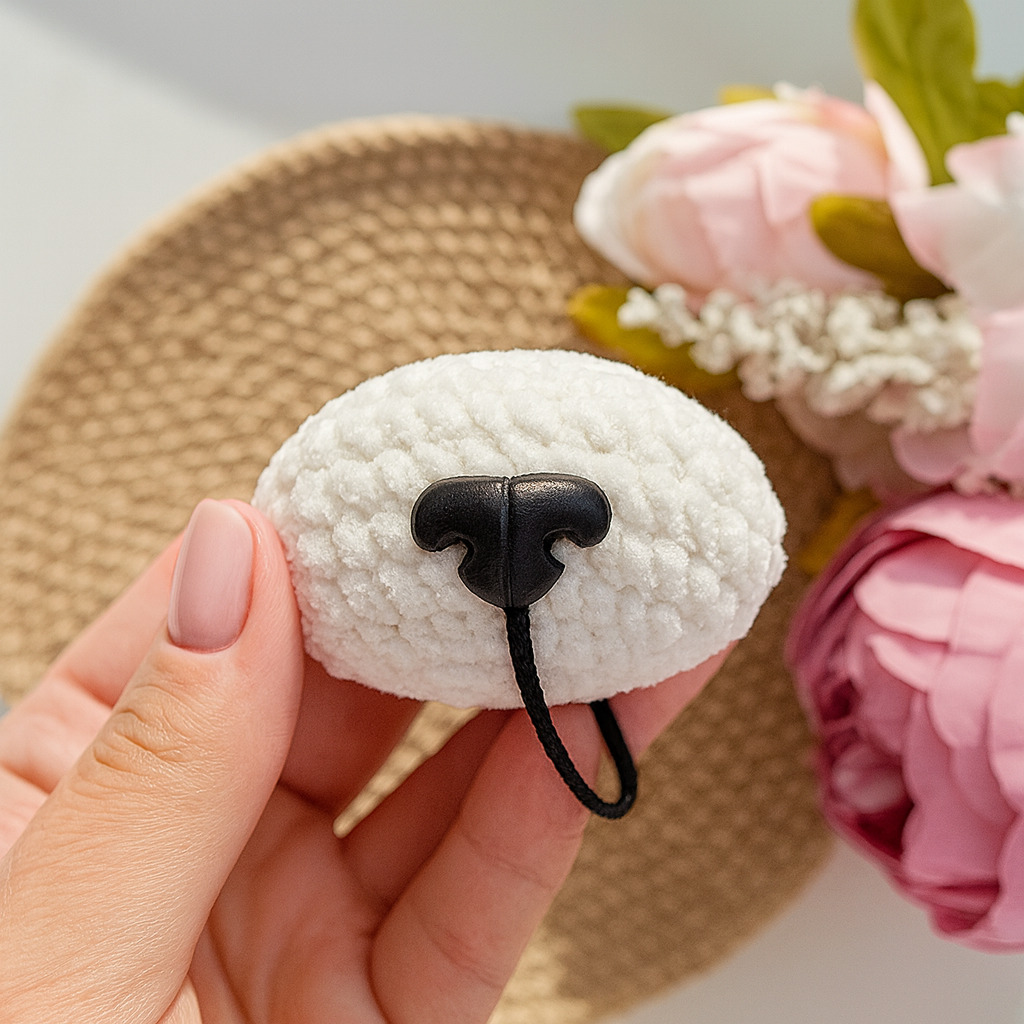
Носик вставляем во втором ряду мордочки посередине.
И в этот же сбн. продеваем черную нить для дальнейшей утяжки мордочки.
| Ряд | Цвет ряда | Вязать | Кол-во петель в ряд |
|---|---|---|---|
| 1 | Набираем 6 в.п. и со 2 петли от крючка вяжем 4сбн., 3 сбн. в крайнюю петлю, теперь вяжем по обратной стороне воздушных петель 3сбн., пр. | 12 | |
| 2 | Пр., 3 сбн., 3 пр., 3 сбн., 2 пр. | 18 |
Берем иголку с прочной нитью и входим посередине снизу головы выводим во внешний угол глаза.
Затем заходим во внутренний угол того же глаза и выводим иглу через соседний сбн.
Внизу головы (около хвостика нитки). Заходим иглой в тоже место, где хвостик, и повторяем тоже самое со вторым глазом.
И так же выводим иглу через соседний сбн. Затем подтягиваем ниточки, видим как опускаются глазки и формируется бугорок.
Добиваемся нужного нам эффекта и завязываем нитки на узел между собой.
Вводим иглу с внутренней стороны лапки между 4 и 5 рядами и оставляем небольшой хвостик.
Выводим иглу наружу между теми же рядами. Прокладываем нить по лапке, и придерживая нить вводим иглу сново с низу. Но выводим теперь на 2 сбн.
Вправо и на 1 ряд ниже. Сново прокладываем нить по лапке и вводим иглу с внутренней стороны лапки так жена 1 ряд ниже и 2 сбн. в бок.
И выводим иглу слевой стороны так же на 1 ряд ниже и на 2 сбн. в бок. Прокладываем нить по лапке и вводим иглу свнутренней стороны так же на 1 ряд ниже и на 2 сбн. в бок и выводим иглу в первоначальной точке.
Нити связываем и прячем внутрь лапки. Тоже самое делаем и со второй лапкой.
Берем большую иголку и белую хлопковую нить и вводим иглу посередине внизу головы и выводим во внешнем нижнем углу глаза.
Прокладываем нить по внешней стороне глаза и вводим иглу в верхний внешний угол глаза. Подтягиваем нить, чтобы нитка плотно прилегала к краю глаза, а незаходила на него.
Если все таки нить недержится и заходит на глаз, то воспользуйтесь клеем. Проклейте аккуратно ниточку, чтобы не запачкать плюшевую пряжу.
Чтобы симметрично вышить реснички советую наметить их будущее расположение портновскими булавками.
Теперь берем иголку и черную хлопковую нить и вводим иголку сзади головы и выводим ее на 2 сбн. сбоку от глаза. Затем прокладываем нить и смотрим как будет лежать ресничка.
Если вас все устраивает, то вводим иглу во внутренний верхний угол глаза и выводим иглу на противоположный глаз. Здесь так же прокладываем ниточку поверху глаза и на 2 сбн. в бок от глаза и вводим туда иглу.
И теперь выводим ее сзади головы, связываем нити и прячем их внутрь головы.
С внешнего угла глаза поднимаем брови на 2 ряда вверх, а с внутреннего на 3 ряда вверх. Длина бровки 5 сбн.
Прикладываем мордочку к голове в том месте, где у нас получился бугорок после утяжки. Намечаем портновскими булавками там где будем пришивать мордочку. Наполняем мордочку наполнителем. Пришиваем мордочку покругу, при необходимости добавляем еще наполнитель.
После того как пришили мордочку утягиваем мордочку. Связываем концы черной нити, (которую мы пропустили через сбн. носика), и подтягиваем их. Прячем концы внутрь головы.
Уши пришиваем между 15 и 16 рядами. Предварительно закрепив их портновскими булавками. Расстояние между ними 9 сбн.
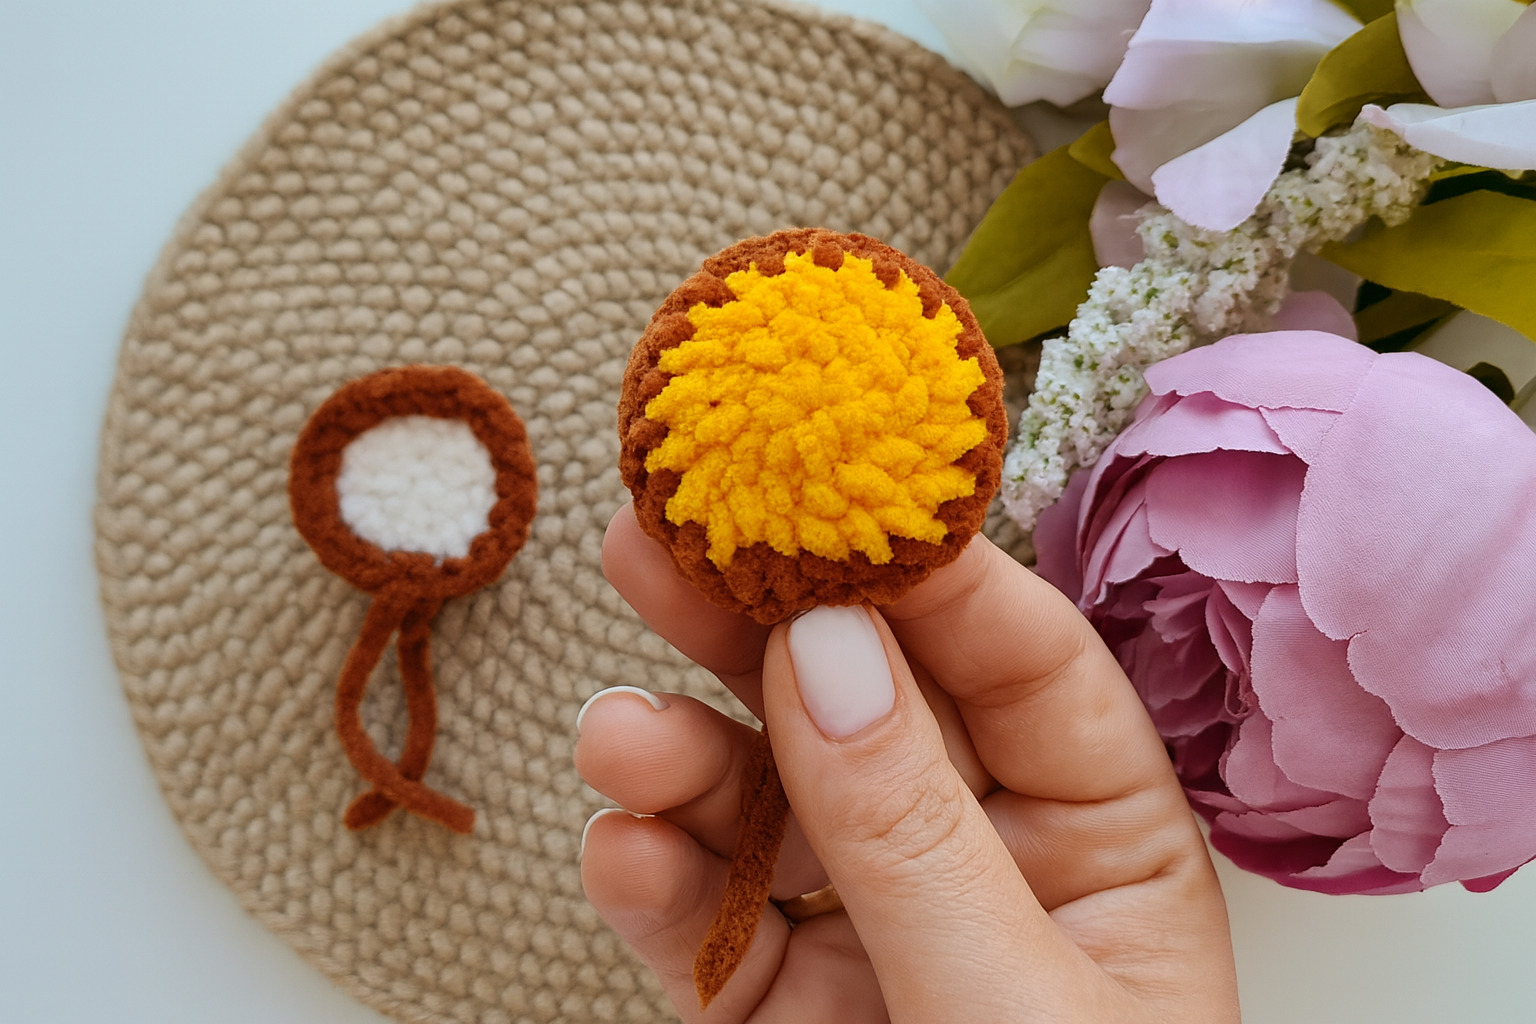
Закрепляем волосики портновскими булавками к голове. И пришиваем их по кругу.
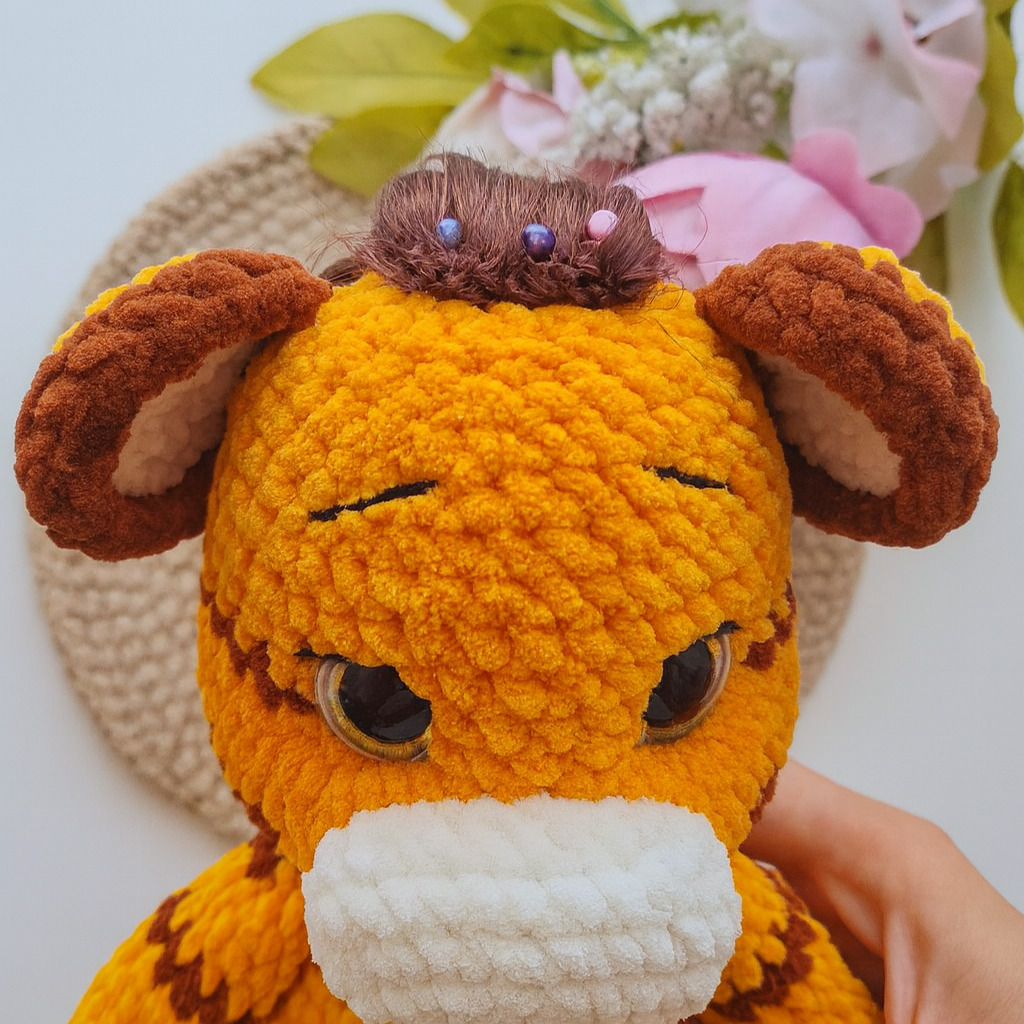
Master Class on Plush Yarn Toys - Tiger Cub
- Depending on the brand of yarn, hook size, and your personal crochet style and tension, the final size of the toy and the amount of yarn required may vary.
- It is recommended to crochet all parts in the order given in this pattern.
- Crochet tightly so that the stuffing does not show through the stitches.
- Skill level: intermediate.
- For paired parts (such as arms, legs, ears), it is best to crochet them one after the other.
- Don’t leave the second part “for later,” otherwise they might come out different in size.
MR – magic ring;
sc – single crochet;
inc – increase, 2 sc in one stitch;
dec – decrease, sc 2 stitches together;
hdc – half double crochet;
ch – chain;
sl st – slip stitch;
(...) * N – repeat the instructions inside brackets N times;
CC – change color.
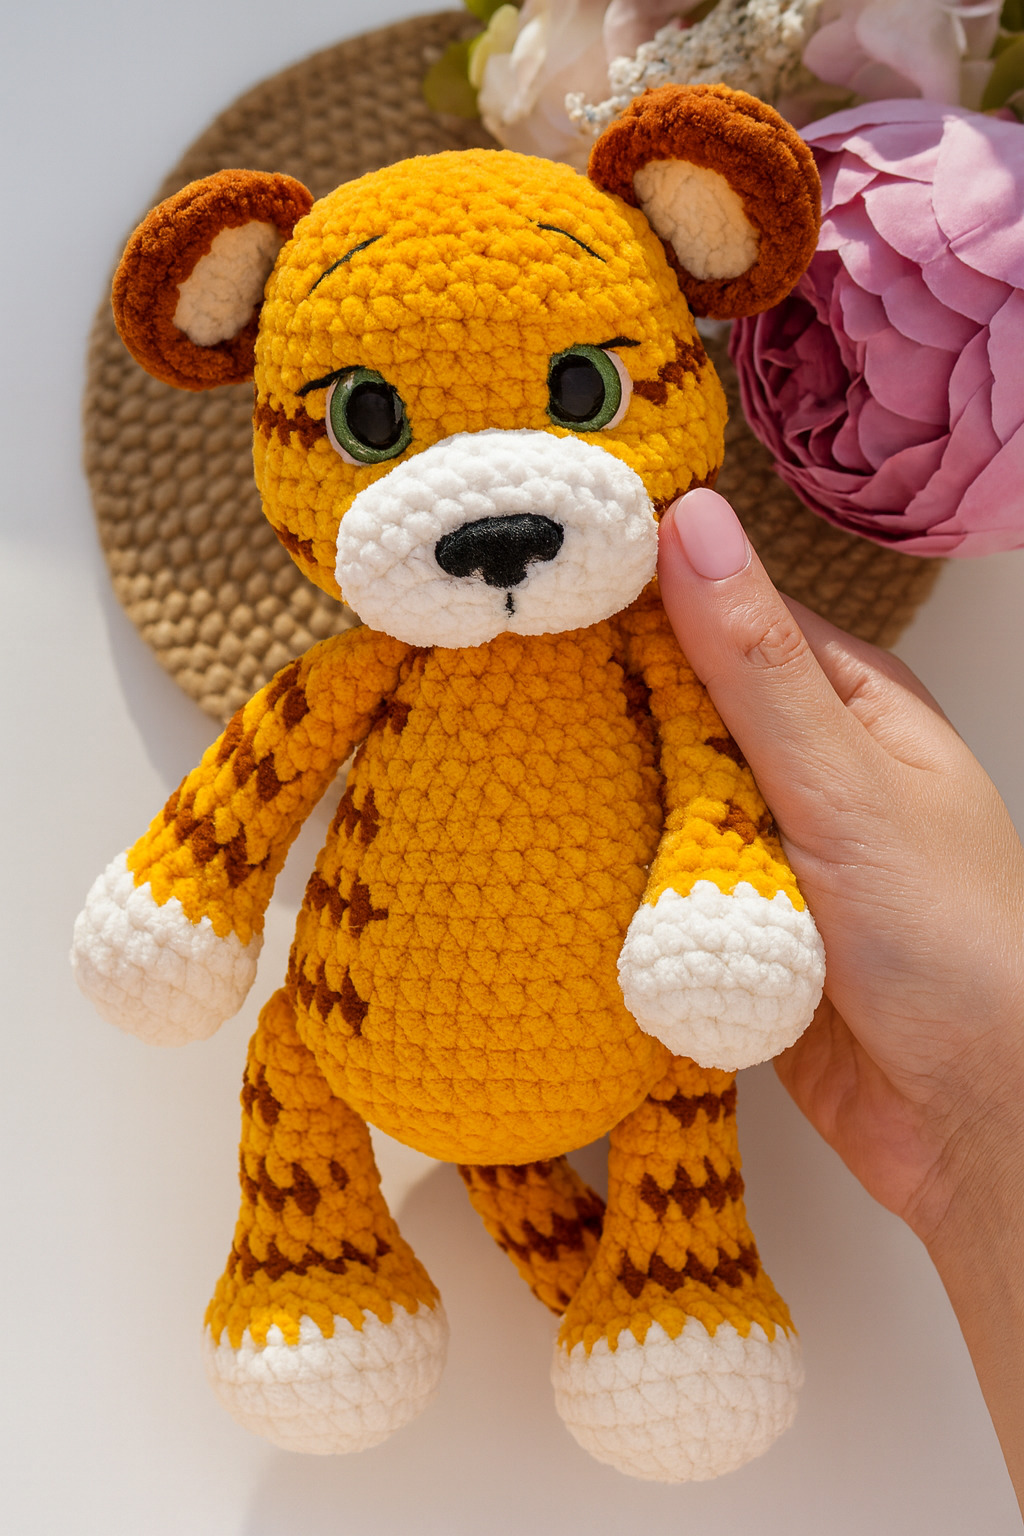
When using the listed materials, the finished toy will be approx. 25 cm (10 in) tall.
- Plush yarn 120 m / 100 g (e.g., LaVita yarn)
- Main color: 100 g
- Additional color: 20 g
- YarnArt Jeans for details: White (01) Black (28)
- Crochet hook: size 3.0 mm or 3.5 mm (depending on your tension)
- Safety eyes: 16 mm
- Safety nose: 16 mm
- Large yarn needle (for sewing parts together)
- Stitch marker
- Scissors
- Polyester fiberfill stuffing
- Sewing pins
- Fabric glue (optional, for securing details)
Begin crocheting with white yarn.
Both arms are worked the same way.
The stitch marker should stay in the middle at the bottom.
| Round | Color | Crocheting... | Stitch Count |
|---|---|---|---|
| 1 | 6 sc in MR | 6 | |
| 2 | 6 inc | 12 | |
| 3 | (1 sc, inc) * 6 | 18 | |
| 4 | 5 sc, (1 sc, inc) * 4, 5 sc | 22 | |
| 5-6 | 22 sc (2 rnds) | 22 |
| 7 | 5 sc, (1 sc, dec) * 4, 5 sc | 18 | |
| 8 | (1 sc, dec) * 6 | 12 |
| 9 | 3 sc, [6 sc in brown], 3 sc | 12 | |
| 10-11 | 12 sc (2 rnds) | 12 | |
| 12 | 3 sc, [6 sc in brown], 3 sc | 12 | |
| 13-14 | 12 sc (2 rnds) | 12 | |
| 15 | 4 sc, [4 sc in brown], 4 sc | 12 | |
| 16-17 | 12 sc (2 rnds) | 12 | |
| 18 | 5 sc, [2 sc in brown], 5 sc | 12 | |
| 19 | 12 sc | 12 |
Crochet a couple of extra sc to align the marker so it ends up on the side of the arm.
Flatten the piece and close it by crocheting 6 sc across both layers.
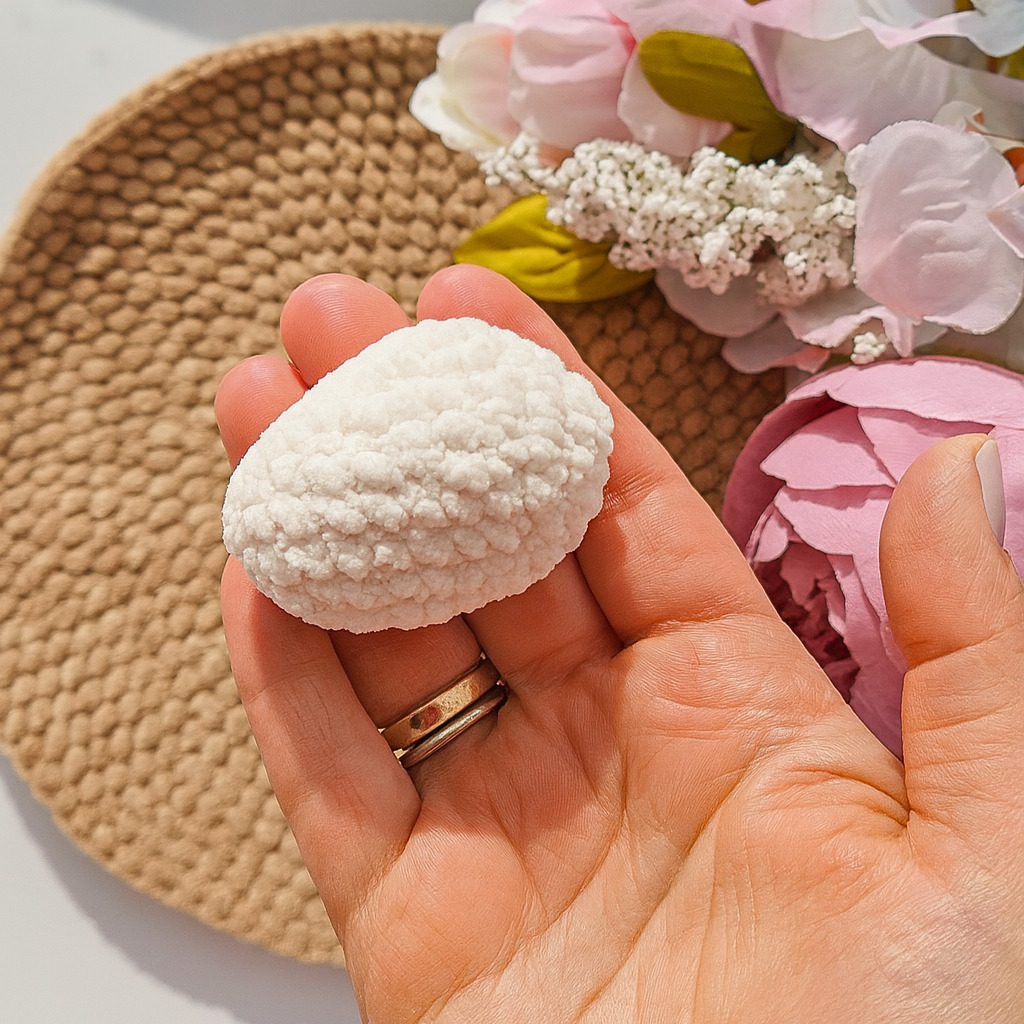
| Round | Color | Crocheting... | Stitch Count |
|---|---|---|---|
| 1 | 8 sc in MR. | 8 | |
| 2-5 | 8 sc (4 rnds) | 8 |
| 6-7 | 8 sc (2 rnds) | 8 |
| 8 | 1 sc, [6 sc in brown], 1 sc | 8 | |
| 9-10 | 8 sc (2 rnds) | 8 | |
| 11 | 1 sc, [6 sc in brown], 1 sc | 8 | |
| 12-13 | 8 sc (2 rnds) | 8 | |
| 14 | 1 sc, [6 sc in brown], 1 sc | 8 | |
| 15-16 | 8 sc (2 rnds) | 8 | |
| 17 | 1 sc, [6 sc in brown], 1 sc | 8 | |
| 18-19 | 8 sc (2 rnds) | 8 | |
| 20 | 1 sc, [6 sc in brown], 1 sc | 8 | |
| 21-22 | 8 sc (2 rnds) | 8 | |
| 23 | 1 sc, [6 sc in brown], 1 sc | 8 | |
| 24 | 8 sc | 8 |
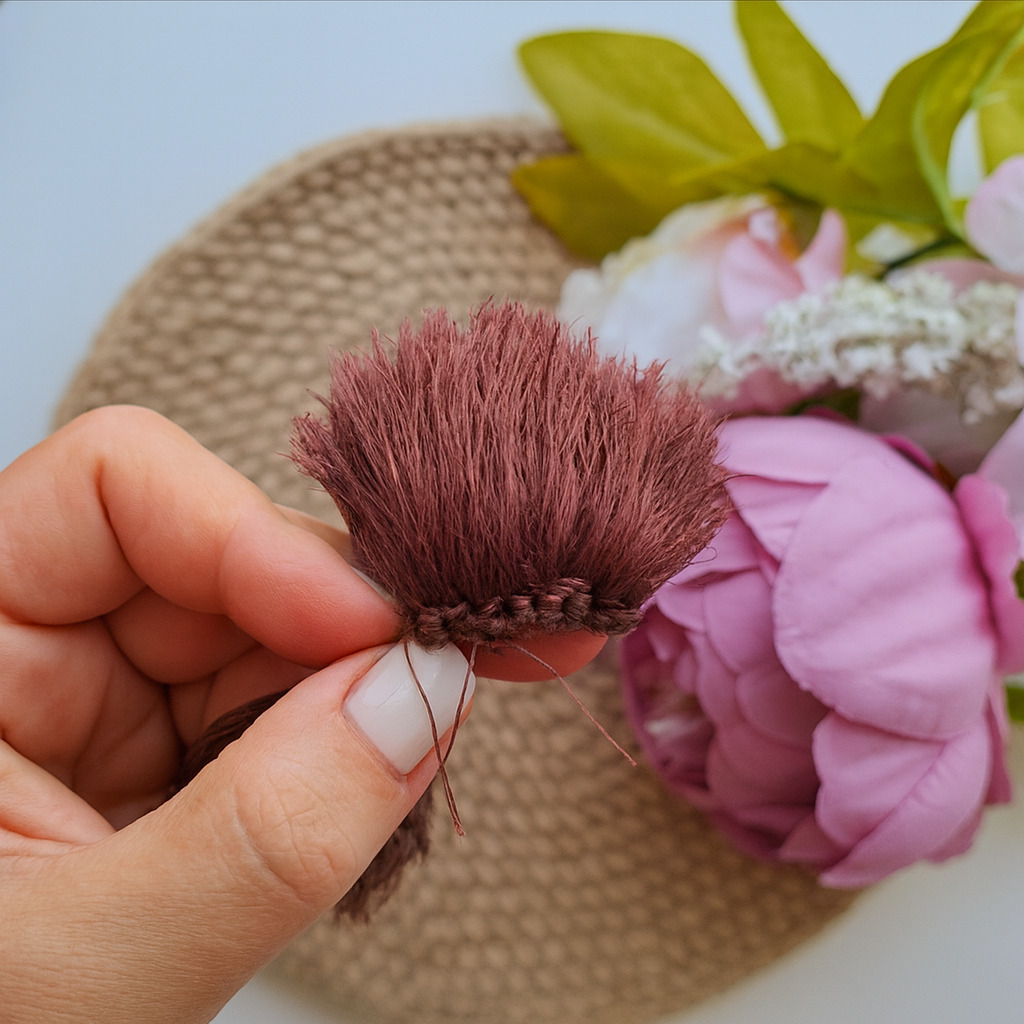
Do not stuff the tail.
Make 1 sc and stop on the side of the tail. Flatten the piece and close by crocheting 4 sc across both layers.
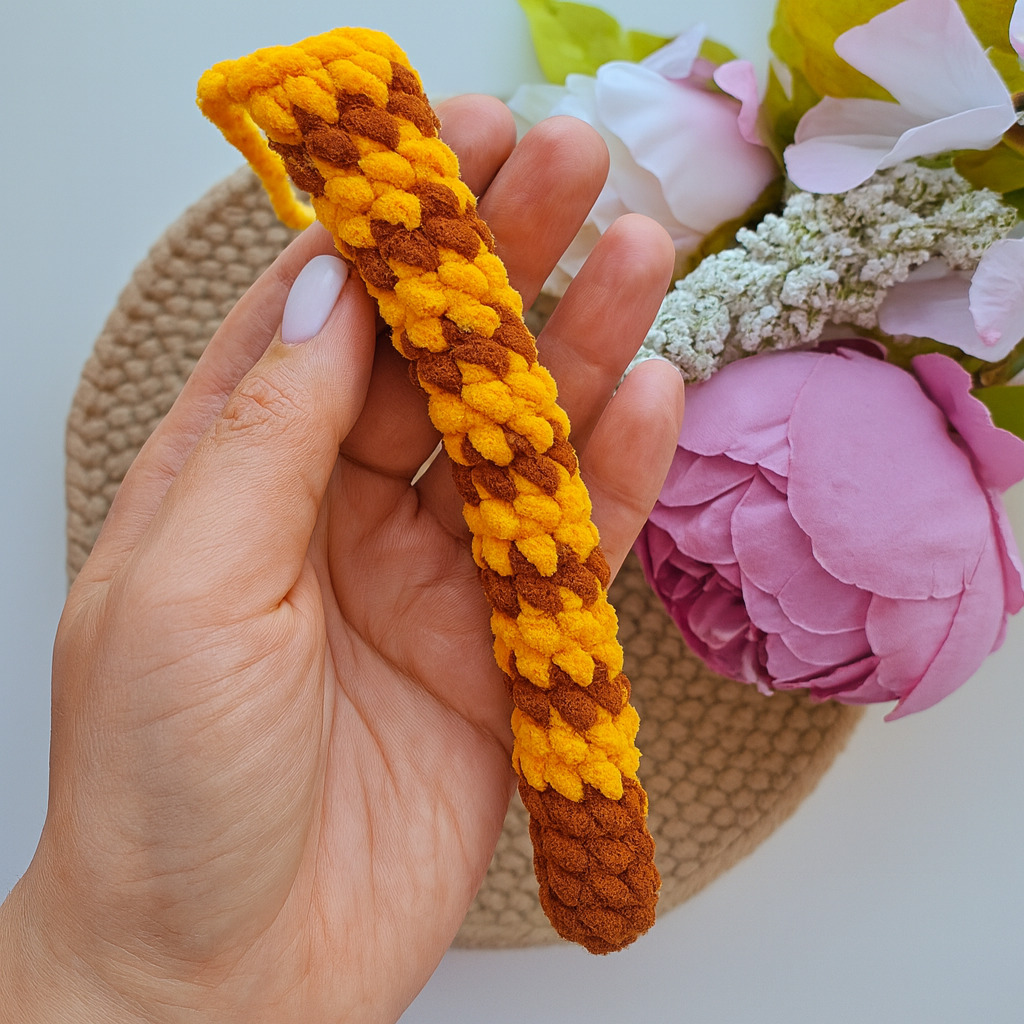
Begin crocheting with white yarn.
Keep the stitch marker aligned in the back center of the leg; if needed, make adjustment stitches to keep it straight.
| Round | Color | Crocheting... | Stitch Count |
|---|---|---|---|
| 1 | 8 sc in MR | 8 | |
| 2 | 8 inc | 16 | |
| 3 | 5 sc, 6 inc, 5 sc | 22 |
| 4 | 7 sc, (1 sc, inc) * 4, 7 sc | 26 |
| 5 | 3 sc, [7 sc], 6 sc, [7 sc], 3 sc | 26 | |
| 6 | 26 sc | 26 | |
| 7 | 7 sc, (dec, 1 sc) * 4, 7 sc | 22 | |
| 8 | 3 sc, [6 sc], 4 sc, [6 sc], 3 sc | 22 | |
| 9 | 5 sc, (1 sc, dec) * 4, 5 sc | 18 | |
| 10 | (1 sc, dec) * 6 | 12 | |
| 11 | 12 sc | 26 | |
| 12 | (1 sc, inc) * 6 | 18 | |
| 13 | 3 sc, [4 sc], 4 sc, [4 sc], 3 sc | 18 | |
| 14 | 6 inc, 12 sc | 24 | |
| 15 | 24 sc | 24 |
Stuff the leg firmly as you crochet, shaping the foot.
In the next stitch, make a sl st, cut the yarn, and fasten off.
Crochet the same way as the left leg except for Round 14:
| 14 | 12 sc, 6 inc | 24 | |
| 15 | 24 sc | 24 |
Do not cut the yarn!
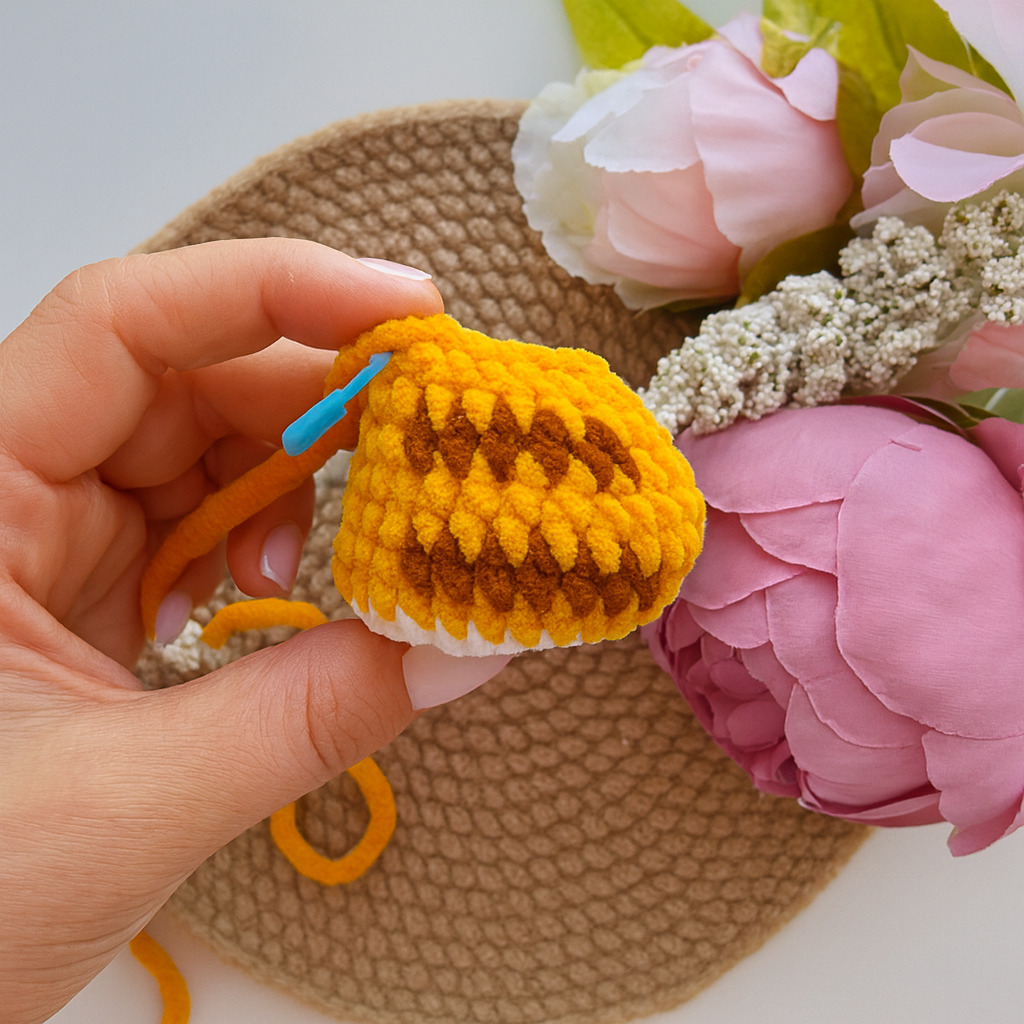
Crochet 6 additional sc and stop on the inner side of the leg, with the hook positioned at the side.
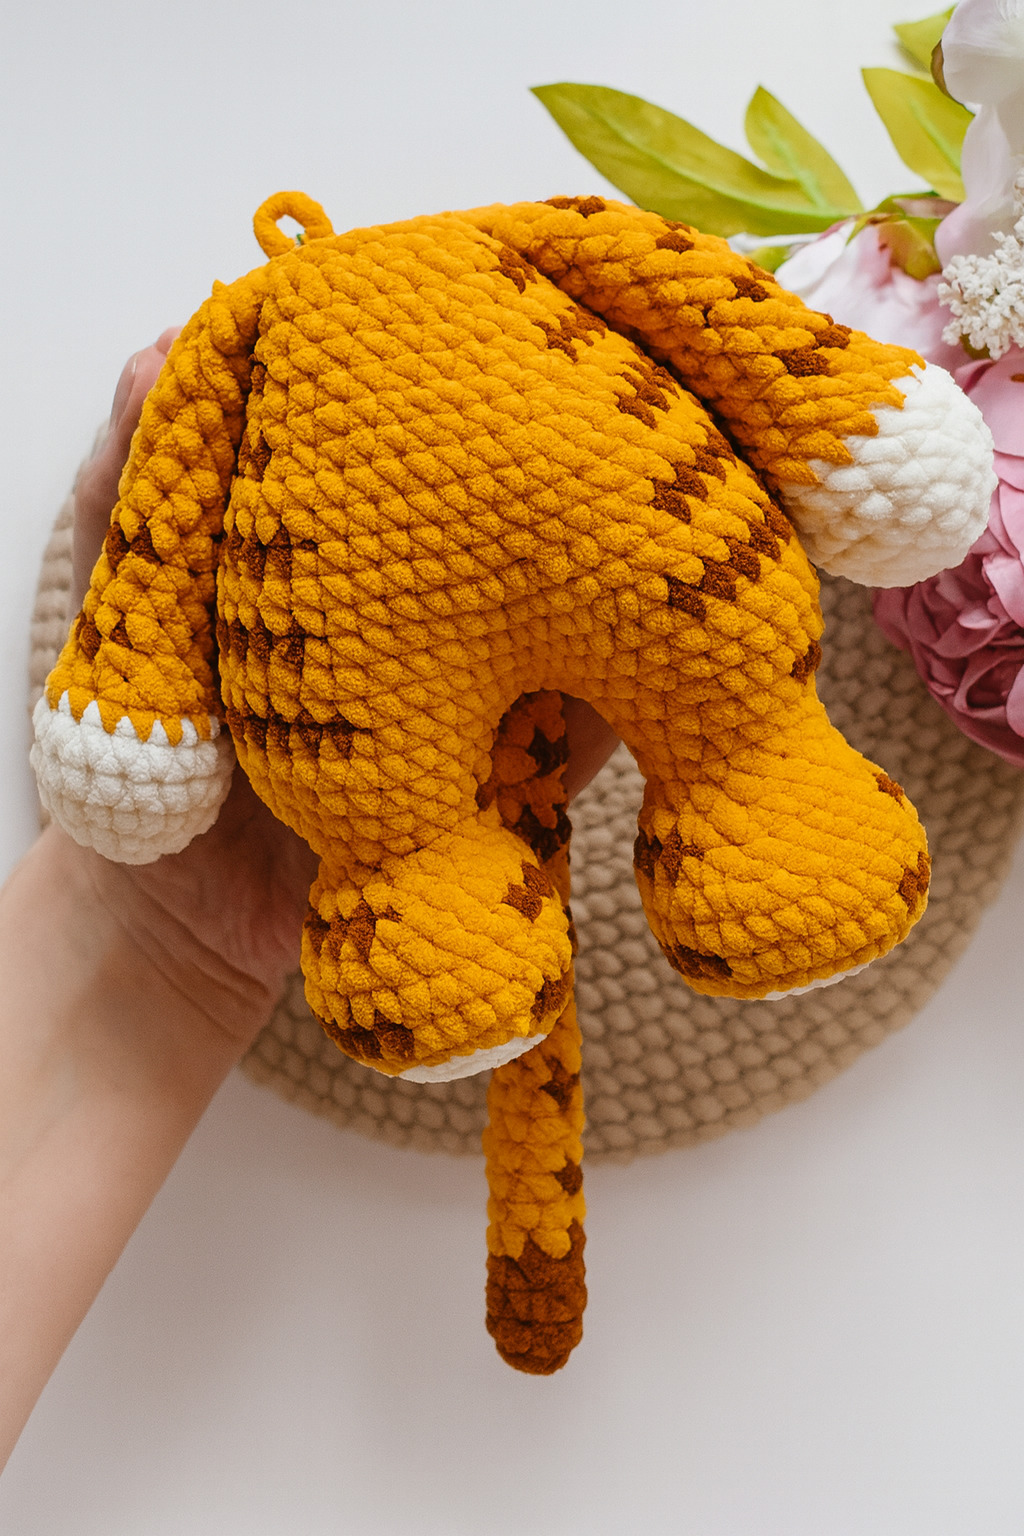
Continue working with orange yarn. Hold the legs facing you (front side).
| Round | Color | Crocheting... | Stitch Count |
|---|---|---|---|
| 1 | On the right leg (the one with the working yarn), crochet 6 more sc forward and stop on the side of the leg. Chain 2, place a stitch marker in the second chain — this will be the center front of the body. Then chain 1 more (total 3 chains). On the left leg, count back 6 stitches from the last stitch of the round and join the chain into that stitch. Crochet around the left leg: 24 sc, then 3 sc across the chain, then 24 sc around the right leg, and finally 2 sc along the other side of the chain. | 54 |
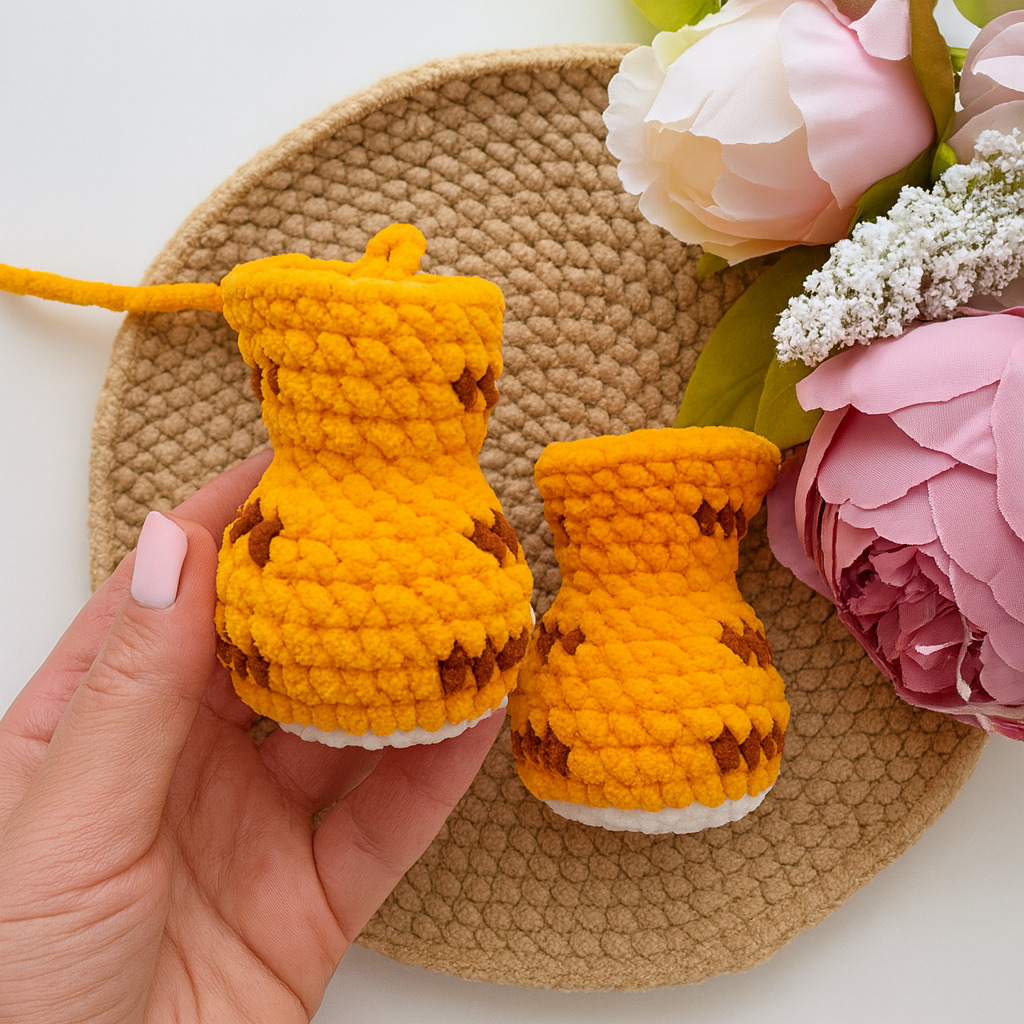
Starting from Row 2, begin working the stripes.
[...] – the number inside the square brackets indicates how many single crochets (sc) should be worked in brown to create the stripes on the body.
Make sure the stitch marker runs straight down the center of the body. If necessary, add shifting stitches to keep alignment.
| 2 | 8 sc, [12 sc], 14 sc, [12 sc], 8 sc | 54 | |
| 3 | 11 sc, (1 sc, dec) * 3, 15 sc, (dec, 1 sc) * 3, 10 sc | 48 |
In Rows 4 and 5, crochet the tail into the body, placing it with the stripes facing upward.
| 4 | 46 sc, 2 sc together with the tail | 48 | |
| 5 | 2 sc with the tail, 7 sc, [8 sc], 15 sc, [8 sc], 8 sc | 48 | |
| 6 | (6 sc, dec) * 6 | 42 | |
| 7 | 42 sc | 42 | |
| 8 | 8 sc, [7 sc], 12 sc, [7 sc], 8 sc | 42 | |
| 9 | (5 sc, dec) * 6 | 36 | |
| 10 | 36 sc | 36 | |
| 11 | 7 sc, [6 sc], 11 sc, [6 sc], 6 sc | 36 | |
| 12 | (4 sc, dec) * 6 | 30 | |
| 13 | 30 sc | 30 |
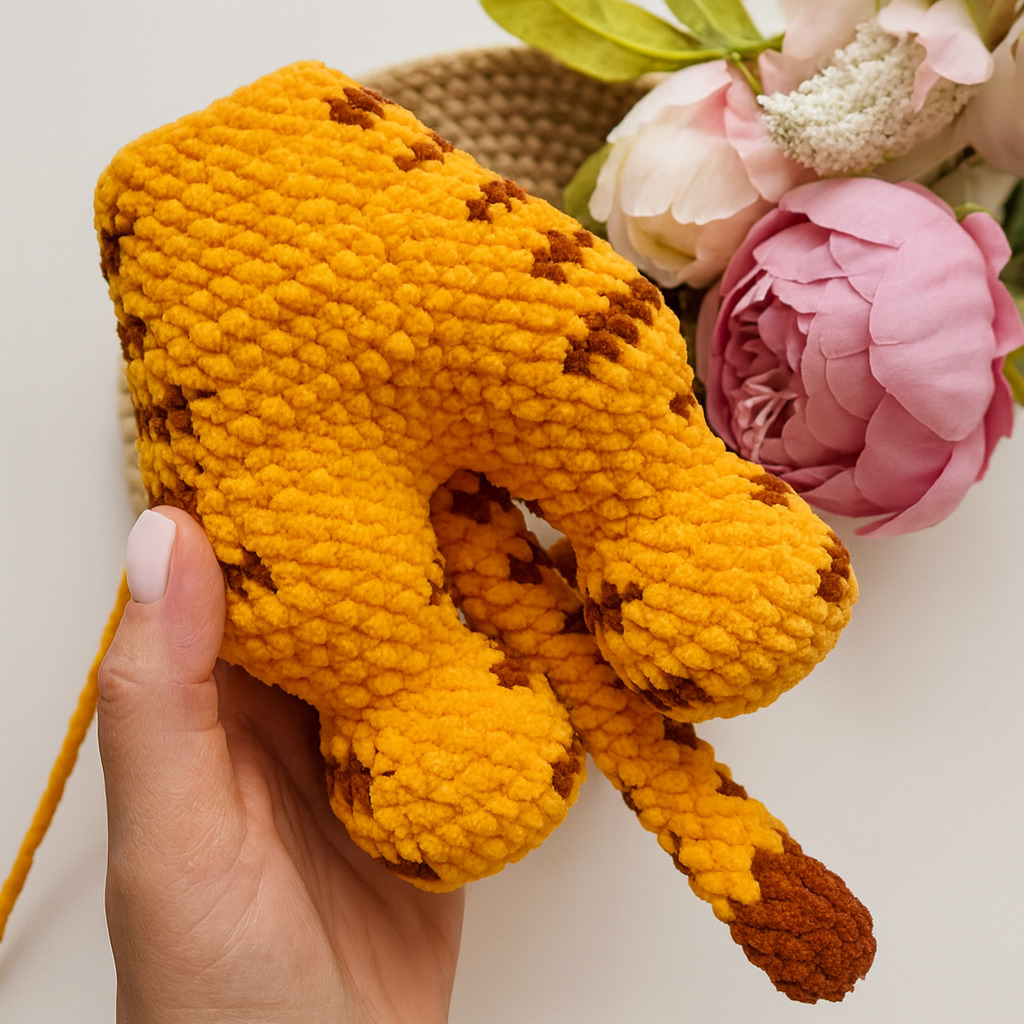
As you crochet, stuff the body firmly with filling, paying special attention to the tummy.
| 14 | 6 sc, [5 sc], 9 sc, [5 sc], 5 sc | 30 | |
| 15 | (3 sc, dec) * 6 | 24 | |
| 16 | 24 sc | 24 |
In Round 17, crochet the arms into the body:
| 17 | 3 sc, 6 sc together with the arm, 6 sc, 6 sc together with the other arm, 3 sc | 24 | |
| 18 | (2 sc, dec) * 6 | 18 | |
| 19 | 18 sc | 18 |
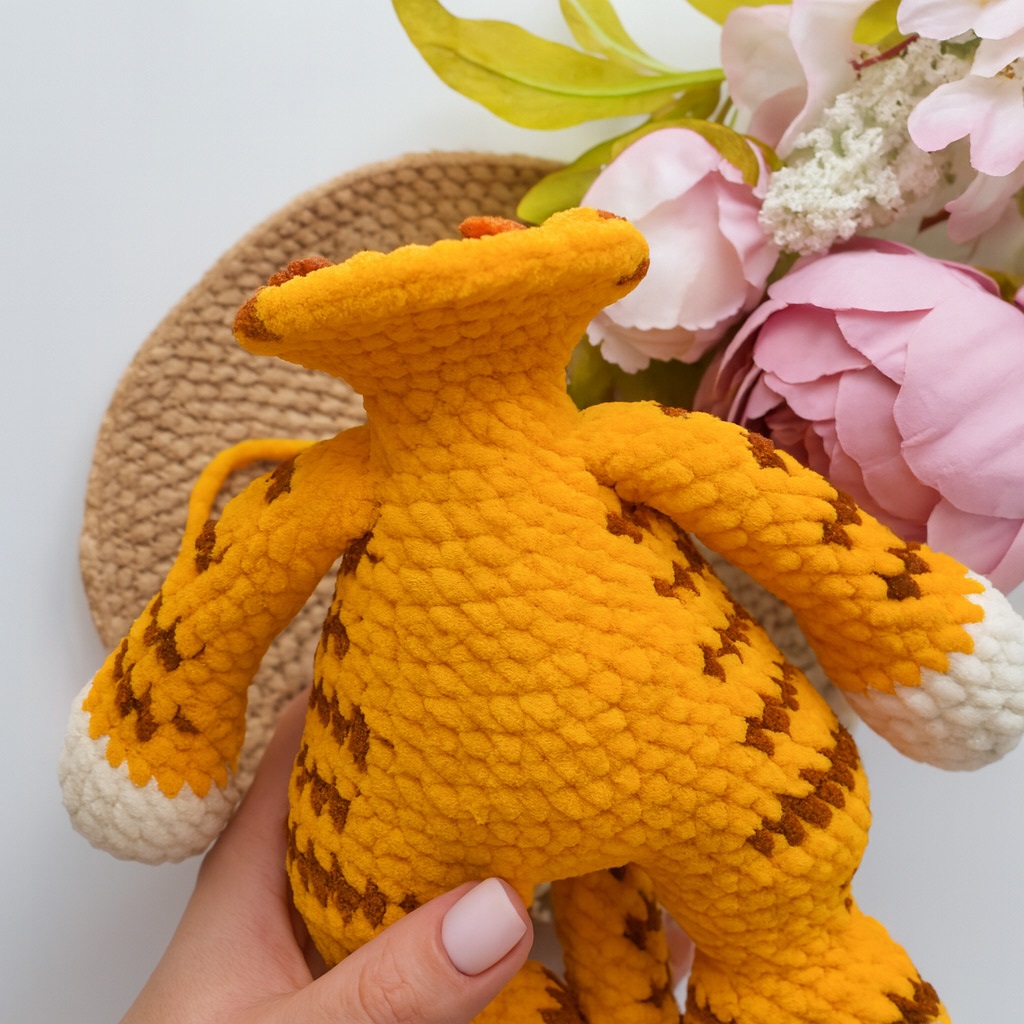
Do not cut the yarn. Continue directly with the Head.
Make sure the stitch marker runs straight down the back center of the head. If necessary, add shifting stitches to keep alignment.
| Round | Color | Crocheting... | Stitch Count |
|---|---|---|---|
| 1 | 18 sc | 18 | |
| 2 | (2 sc, inc) * 6 | 24 | |
| 3 | (3 sc, inc) * 6 | 30 | |
| 4 | (4 sc, inc) * 6 | 36 | |
| 5 | (5 sc, inc) * 6 | 42 | |
| 6 | (6 sc, inc) * 6 | 48 | |
| 7 | 12 sc, (1 sc, inc) * 3, 12 sc, (inc, 1 sc) * 3, 12 sc | 54 |
| 8 | 7 sc, [12 sc in brown], 16 sc, [12 sc in brown], 7 sc | 54 | |
| 9-10 | 54 sc (2 rnds) | 54 | |
| 11 | 15 sc, 4 dec, 8 sc, 4 dec, 15 sc | 46 | |
| 12 | 8 sc, [8 sc in brown], 13 sc, [8 sc in brown], 9 sc | 46 | |
| 13 | 3 sc, dec, 11 sc, dec, 10 sc, dec, 11 sc, dec, 3 sc | 42 | |
| 14-16 | 42 sc (3 rnds) | 42 | |
| 17 | (5 sc, dec) * 6 | 36 |
| 18 | 36 sc | 36 | |
| 19 | (4 sc, dec) * 6 | 30 | |
| 20 | (3 sc, dec) * 6 | 24 | |
| 21 | (2 sc, dec) * 6 | 18 | |
| 22 | (1 sc, dec) * 6 | 12 | |
| 23 | 6 dec | 6 |
Make a sl st in the next stitch, cut the yarn, fasten off, and weave in the end.
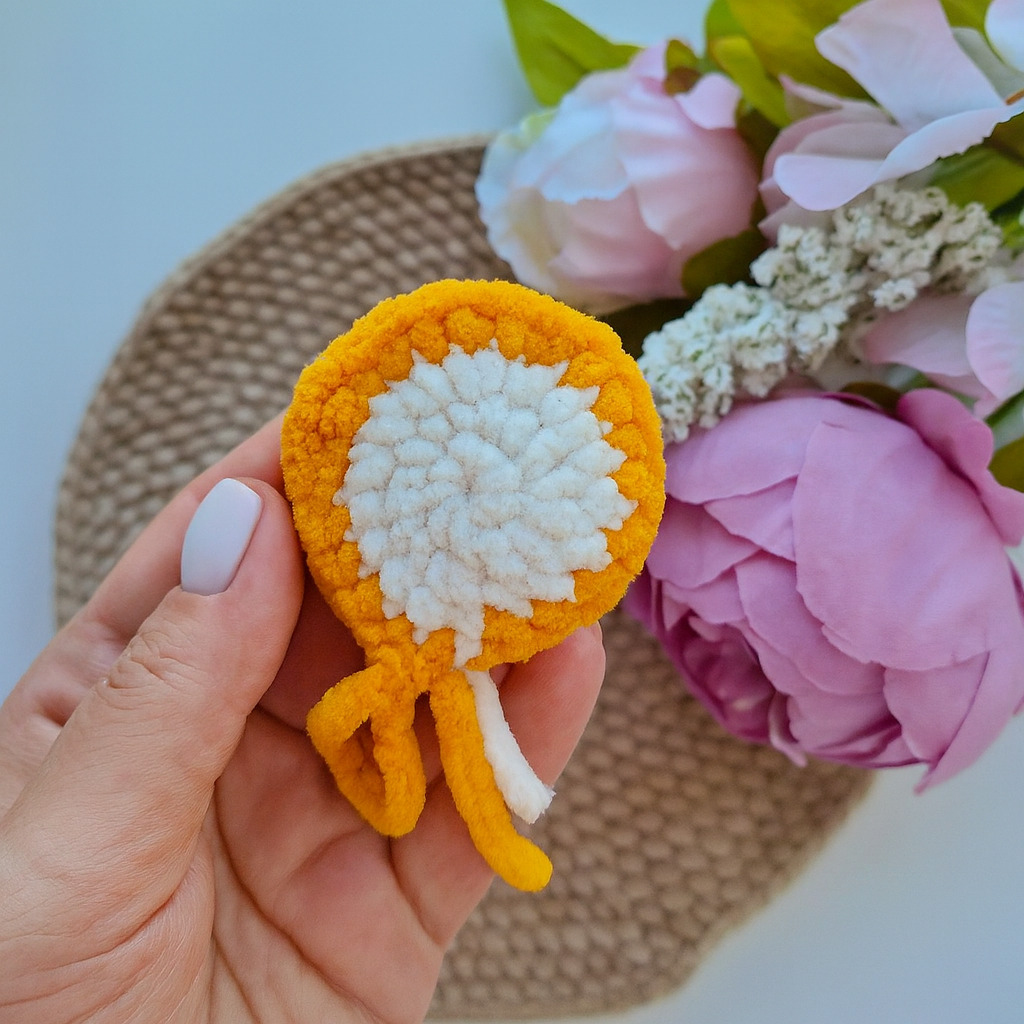
You will need to crochet 4 pieces total: 2 pieces in the additional color (white) 2 pieces in the main color (orange) All 4 pieces are made from the same pattern:
| Round | Color | Crocheting... | Stitch Count |
|---|---|---|---|
| 1 | 6 sc in MR | 6 | |
| 2 | 6 inc | 12 | |
| 3 | (1 sc, inc) * 6 | 18 |
Now take one white piece and one orange piece and place them together wrong sides facing. Keep the orange piece facing you. With brown yarn, crochet around both layers together: 18 sc. Work one more round of 18 sc, but crochet in the back loops only. Fasten off, cut the yarn, and hide the ends inside.
Crochet with white yarn.
| Round | Color | Crocheting... | Stitch Count |
|---|---|---|---|
| 1 | Ch 9, starting from the 2nd ch from the hook: 7 sc, 3 sc in the last ch, continue on the other side of the chain: 6 sc, inc | 18 | |
| 2 | (2 sc, inc) * 6 | 24 | |
| 3-4 | 24 sc (2 rnds) | 24 |
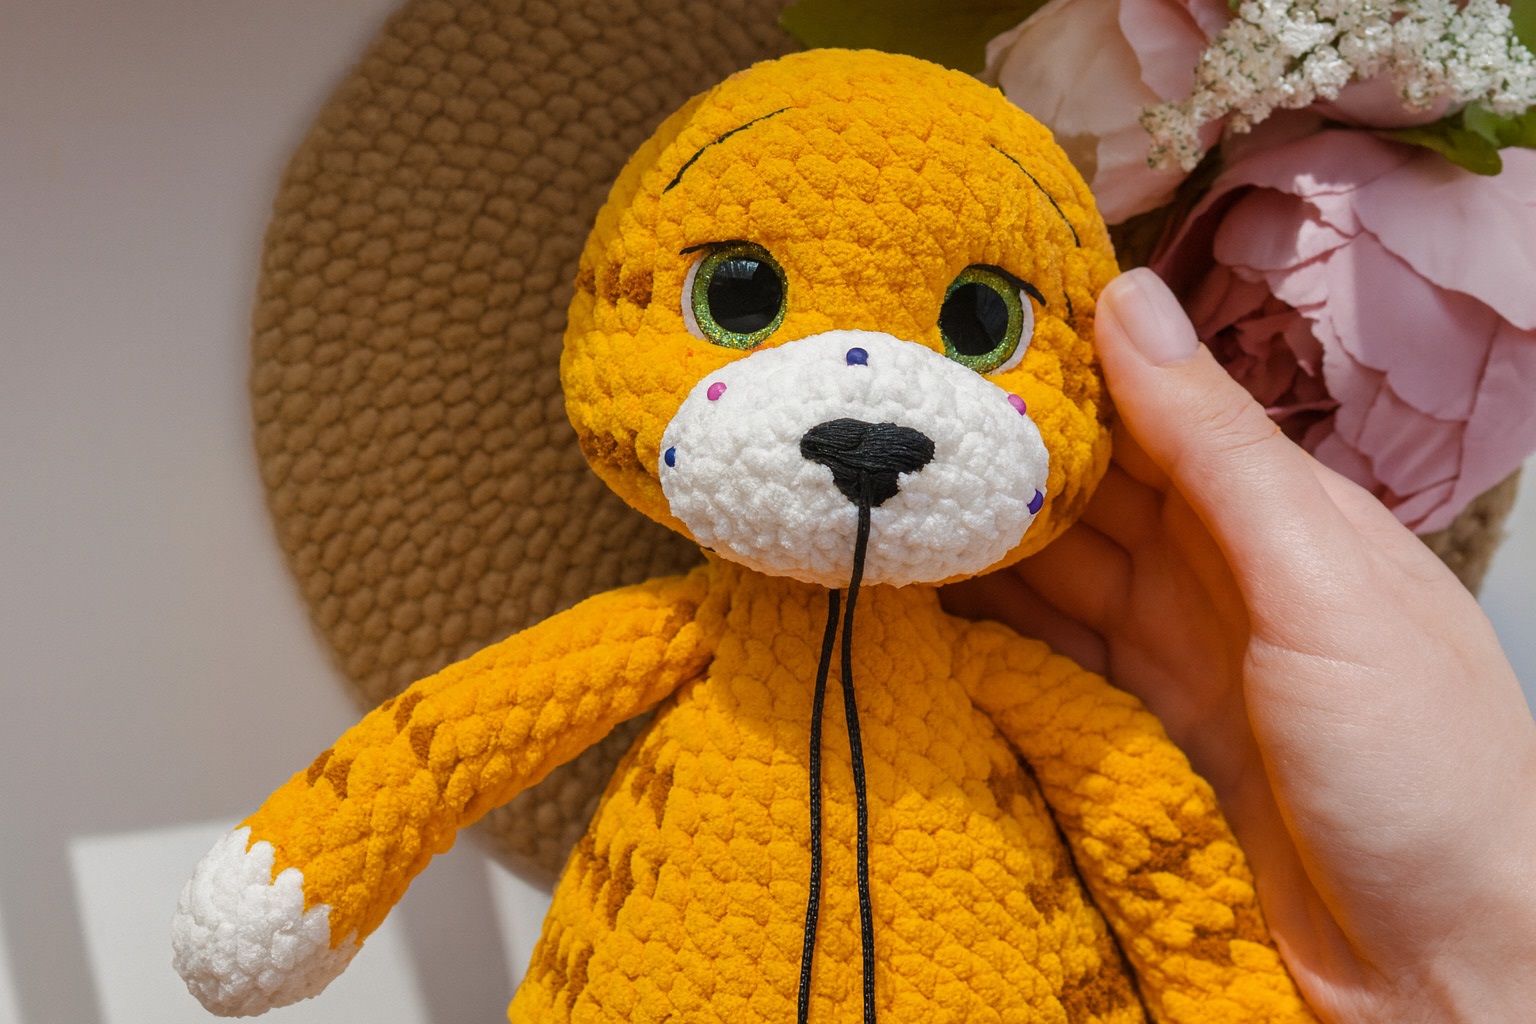
Insert the safety nose in Round 2, centered.
In the same stitch, pull through a strand of black yarn for shaping and tightening the muzzle later.
| Round | Color | Crocheting... | Stitch Count |
|---|---|---|---|
| 1 | Ch 6, starting from the 2nd chain from the hook: 4 sc, 3 sc in the last chain, then continue along the opposite side of the chain: 3 sc, inc | 12 | |
| 2 | inc, 3 sc, 3 inc, 3 sc, 2 inc | 18 |
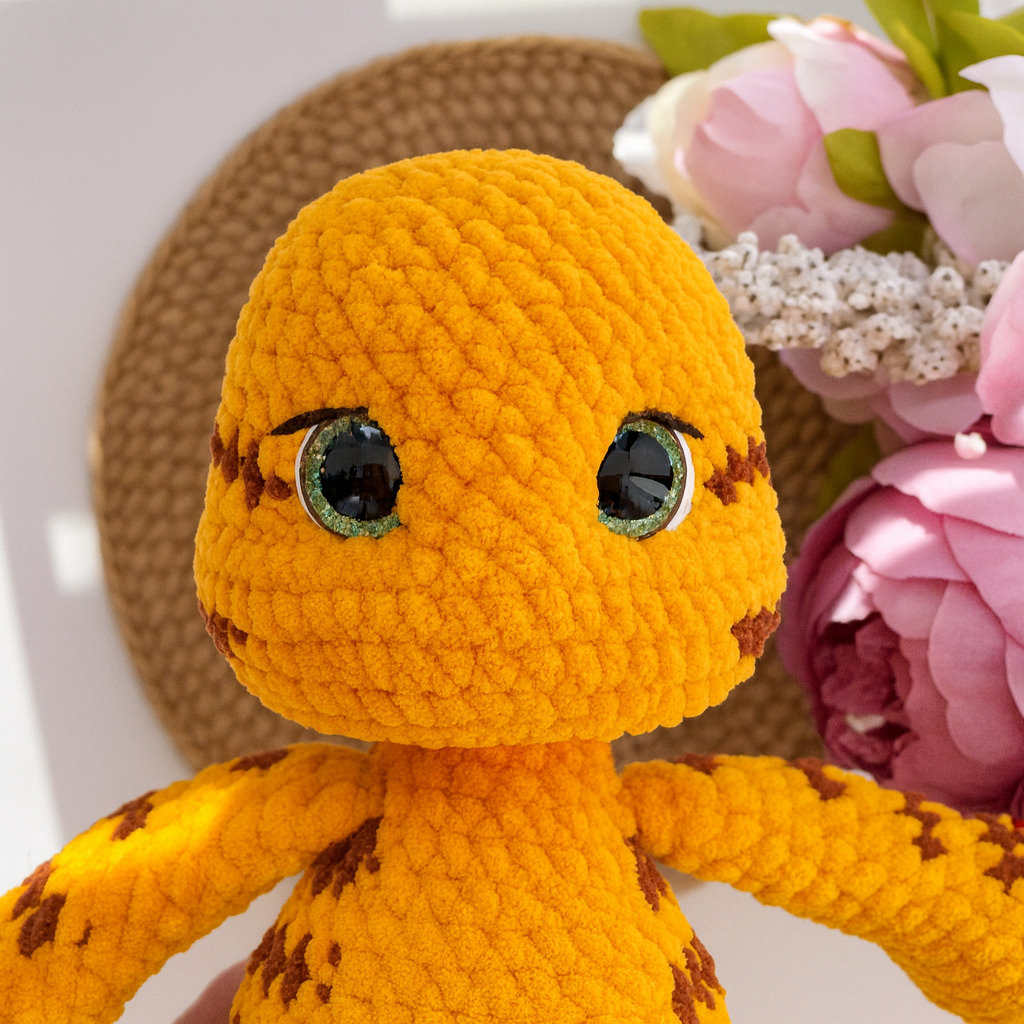
Use a strong thread and needle.
Insert the needle at the bottom center of the head and bring it out at the outer corner of one eye
Insert the needle again at the inner corner of the same eye and bring it out through the stitch next to the yarn tail at the bottom of the head.
Insert the needle once more at the same bottom point (near the yarn tail) and repeat the process for the second eye.
Again, bring the needle out through the stitch next to the bottom point.
Gently pull the threads: the eyes will sink slightly, and a bump (contour of the muzzle) will form.
Adjust the tension until you achieve the desired look, then tie the threads securely into a knot and hide them inside the head.
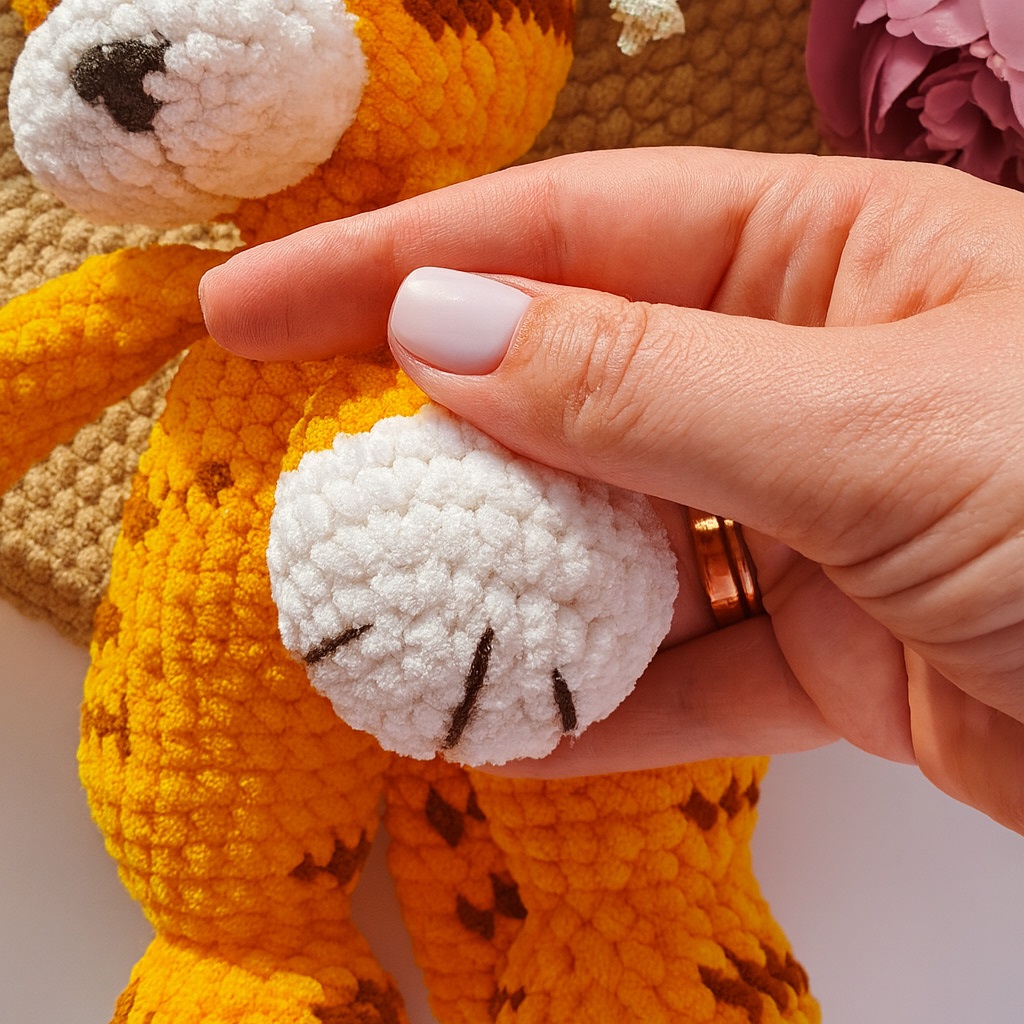
Insert the needle from the inner side of the paw between Rounds 4 and 5, leaving a short tail inside.
Bring the needle out at the same level (between Rnds 4 and 5).
Lay the thread across the paw and insert the needle again from below, this time bringing it out 2 stitches to the right and 1 round lower
Lay the thread again, insert the needle from the inside, and bring it out 1 round lower and 2 stitches to the side.
Repeat once more, bringing the needle out on the left side of the paw (also 1 round lower and 2 stitches to the side).
Finally, bring the needle out at the starting point, tie the thread ends together, and hide them inside the paw.
Repeat the same process for the second paw.
Take a large needle and white cotton thread.
Insert the needle at the bottom center of the head and bring it out at the outer lower corner of the eye.
Lay the thread along the outer side of the eye and insert the needle again at the outer upper corner.
Pull the thread snugly so it stays close to the edge of the eye without slipping over it.
If the thread does not stay in place and covers the eye, secure it with a tiny amount of fabric glue. Apply carefully to avoid staining the plush yarn.
To ensure symmetry, first mark the placement of the eyelashes with sewing pins.
ТThread a needle with black cotton yarn. Insert the needle from the back of the head and bring it out 2 stitches to the side of the eye
Lay the thread across the eye to see how the eyelash will sit. If you’re satisfied with the placement, insert the needle into the inner upper corner of the eye and bring it out at the opposite eye.
On the second eye, lay the thread across the top of the eye, then move 2 stitches to the side and insert the needle again.
Finally, bring the needle out through the back of the head, tie the thread ends securely, and hide them inside.
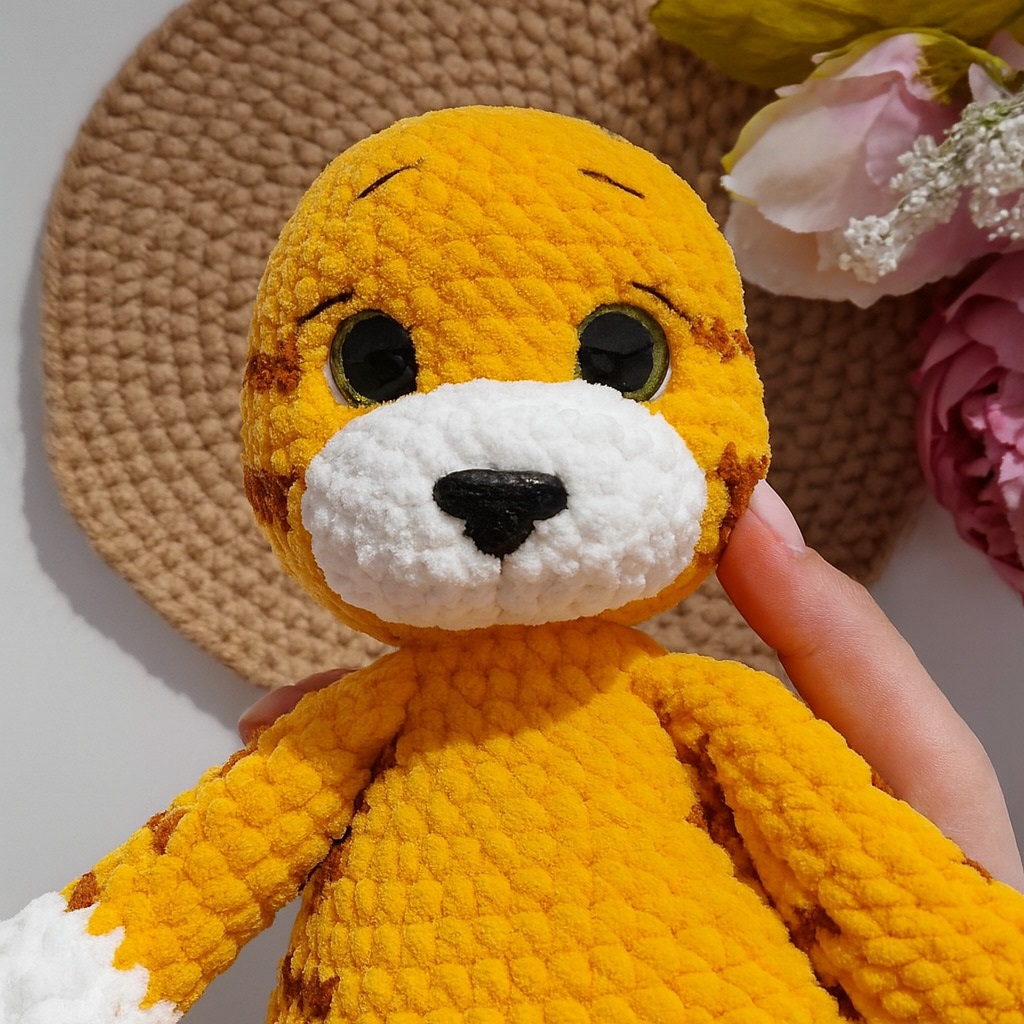
From the outer corner of the eye, place the eyebrow 2 rounds higher.
From the inner corner of the eye, place it 3 rounds higher.
Each eyebrow should measure about 5 stitches in length.
Place the muzzle on the head at the spot where the bump formed after shaping (tightening).
Pin it in place with sewing pins.
Lightly stuff the muzzle with fiberfill.
Sew the muzzle around the edges in a circle, adding more stuffing if needed.
After sewing, tighten the muzzle: Take the ends of the black yarn (inserted earlier through the stitch of the nose), pull them gently to define the shape. Tie the yarn ends securely and hide them inside the head.
Sew the ears between Rounds 15 and 16 of the head. Pin them in place first with sewing pins. The distance between the ears should be about 9 stitches.
Pin the hair tufts to the top of the head with sewing pins. Sew them securely around the base in a circle.